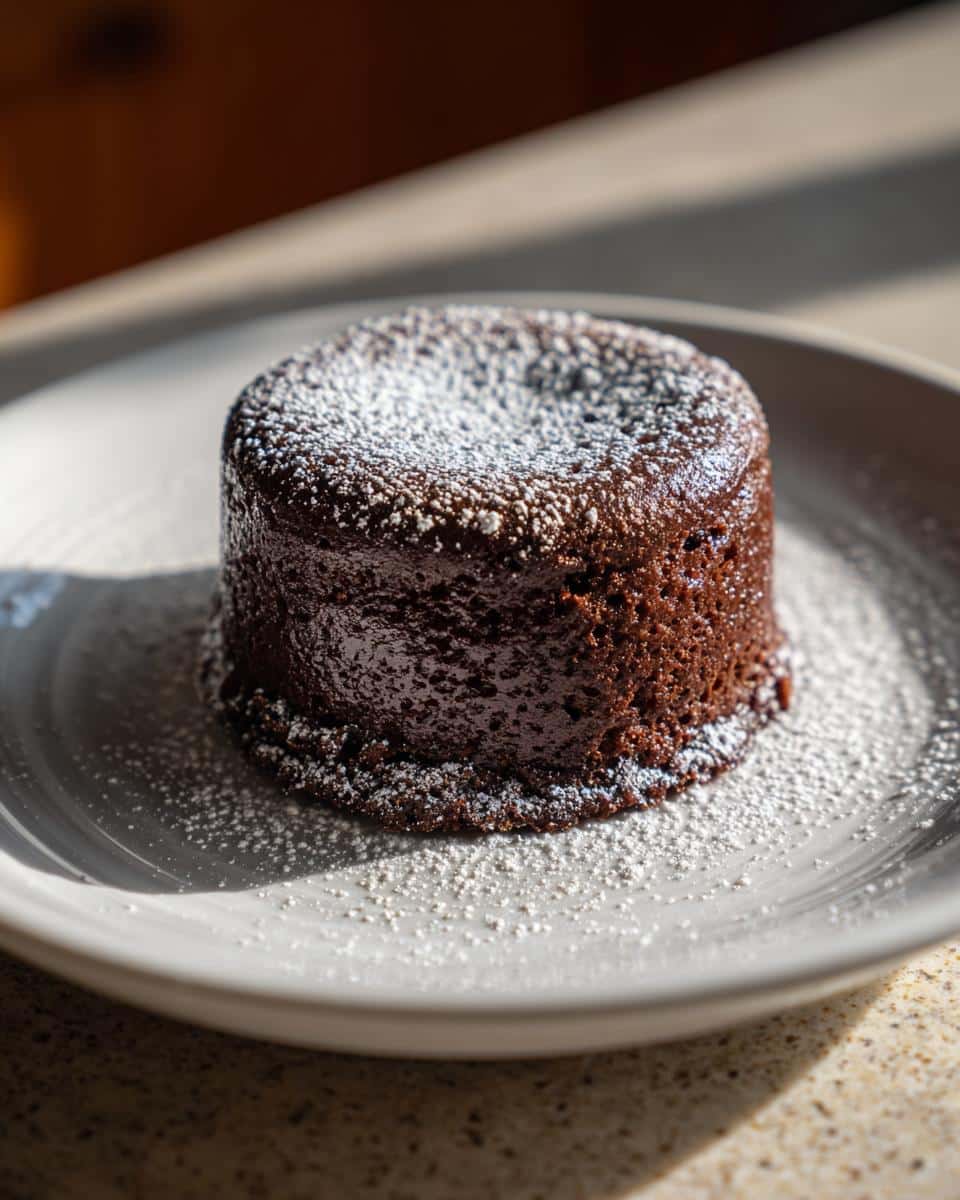
I still remember the first time I tried chocolate lava cake—it was love at first bite. The moment my spoon broke through that delicate outer layer, revealing a river of warm, molten chocolate, I knew I had to learn how to make it myself. After years of testing (and eating) countless versions, I’ve perfected this recipe that’s both foolproof and decadent. The best part? It comes together in under 30 minutes, but tastes like you spent all day in the kitchen. Trust me, once you master this chocolate lava cake, it’ll become your go-to dessert for impressing guests—or just treating yourself on a Tuesday night.
Table of Contents
Why You’ll Love This Chocolate Lava Cake
This isn’t just any dessert—it’s pure magic in a ramekin. Here’s why it’ll become your new obsession:
- Restaurant-quality at home: That perfect molten center and crisp exterior? You can nail it on your first try.
- Faster than takeout: From mixing bowl to oozy goodness in under 30 minutes (yes, really).
- Minimal ingredients: Just butter, eggs, chocolate and pantry staples—no fancy equipment needed.
- Instant wow factor: Guests will think you’re a pastry chef when you flip those ramekins.
- Customizable: Dress it up with berries, ice cream, or enjoy it gloriously plain.
Pro tip: Make extra batter—you’ll want seconds before the first one’s gone
Ingredients for Chocolate Lava Cake
Here’s the beautiful thing about chocolate lava cake—it only needs a handful of simple ingredients to create something spectacular. But don’t let that simplicity fool you Each component plays a starring role in creating that perfect molten center and rich chocolate flavor. Here’s what you’ll need:
- 6 oz dark chocolate, chopped: Use good-quality chocolate (at least 60% cacao) for the best flavor. I prefer bars over chips—they melt more evenly.
- 1/2 cup unsalted butter, plus extra for greasing: That’s 1 stick of butter. Keep it at room temperature for easy mixing (but melt it with the chocolate, as we’ll do later).
- 2 large eggs + 2 large egg yolks: The extra yolks make the cake extra rich and custardy. Crack them straight into the bowl—no need to separate them first
- 1/4 cup granulated sugar: Just enough to sweeten without overpowering the chocolate. Pack it lightly when measuring.
- 1/4 cup all-purpose flour: The perfect amount to give structure without making the cake dense.
- 1/4 tsp salt: Trust me—this tiny amount makes the chocolate flavor pop
See? Nothing fancy, no weird ingredients. Just a short shopping list for one of the most impressive desserts you’ll ever make.
Equipment You’ll Need
You probably have most of this stuff in your kitchen already—that’s the beauty of chocolate lava cake Here’s your quick checklist:
- 4 (6-oz) ramekins: These little ceramic cups are perfect for individual servings. No ramekins? Use oven-safe mugs in a pinch
- Double boiler (or DIY version): Just a heatproof bowl over simmering water to melt that chocolate gently.
- Mixing bowls: One for eggs, one for chocolate—keep things organized.
- Whisk & spatula: For whipping eggs into clouds and folding batter gently.
- Fine mesh sieve: Because nobody wants flour lumps in their molten masterpiece
That’s it No fancy mixers or special tools required—just good old-fashioned baking magic.
How to Make Chocolate Lava Cake
Okay, here’s where the magic happens Don’t let the fancy restaurant presentation fool you—making chocolate lava cake is surprisingly simple when you follow these steps. Just promise me one thing: don’t skip the preheating That hot oven is what gives us that perfect molten center with a delicate outer shell.
Melting the Chocolate
First up: chocolate-butter bliss. I always use a double boiler because it gives me total control—no burnt chocolate disasters here Just fill a saucepan with about an inch of water, bring it to a gentle simmer (not a boil), then place your heatproof bowl with the chopped chocolate and butter on top. The steam will melt everything slowly.
Stir occasionally with a spatula until it’s gloriously smooth—about 5 minutes. No rushing If you see steam escaping around the bowl, turn down the heat. And whatever you do, resist microwaving—it’s too easy to overheat and seize the chocolate. Once melted, set it aside to cool slightly while we work on the eggs.
Whipping the Eggs
Now grab those eggs and sugar—this is where we build our lava cake’s structure. Crack the whole eggs and yolks into a mixing bowl (yes, we’re using both—those yolks add amazing richness). Add the sugar and start whisking like you mean it.
You’ll know it’s ready when the mixture turns pale yellow and falls off the whisk in thick ribbons—about 2-3 minutes of vigorous whisking. No stand mixer? No problem My grandma used nothing but a fork and elbow grease. Just don’t skimp on this step—those air bubbles are what give our cakes that perfect rise.
Now pour in the slightly cooled chocolate mixture and fold gently with a spatula. “Folding” just means scooping from the bottom up—we’re keeping all that air we worked so hard to whip in
Baking the Chocolate Lava Cakes
Almost there Sift the flour and salt right into the batter (this prevents lumps) and fold until just combined—no overmixing Divide the batter between your greased ramekins, filling them about 3/4 full.
Slide them into that preheated 425°F oven and set your timer for 12 minutes. At 10 minutes, start peeking—the edges should look set and slightly puffed, but the centers will still jiggle slightly when shaken. That jiggle is your molten gold waiting to happen Overbaking by even a minute can turn your lava into cake (still delicious, but not the oozy miracle we’re after).
When perfect, pull them out and let them rest exactly 1 minute—no more, no less. Then place a plate upside-down over each ramekin and flip with confidence Wait another 10 seconds before lifting the ramekin… and prepare for your chocolate lava cake masterpiece reveal
Tips for Perfect Chocolate Lava Cake
After making hundreds (okay, maybe thousands) of these little chocolate miracles, I’ve learned a few tricks to guarantee success every time:
- Chocolate matters: Splurge on good-quality dark chocolate (60-70% cacao)—it’s the star of the show
- Grease generously: Butter those ramekins like you’re frosting a cake—every nook needs coverage for clean releases.
- Watch the clock: Set a timer for 10 minutes and check every 60 seconds after—overbaking is the #1 lava killer.
- Room temp eggs: They whip up fluffier than cold ones, giving better rise and texture.
- Rest then flip: Let cakes sit exactly 1 minute after baking—any longer and the centers start setting.
My golden rule? When you think they’re almost done, they’re perfect. That center should look underbaked when you pull them out
Serving Suggestions for Chocolate Lava Cake
Oh, the glorious moment when that warm chocolate river meets something cold and creamy Here’s how I love to serve my chocolate lava cakes:
- Classic: A scoop of vanilla ice cream melting into the center—the hot/cold contrast is magic.
- Fancy: Fresh raspberries and a dusting of powdered sugar for a pretty (and tart) balance.
- Decadent: Whipped cream with a pinch of espresso powder stirred in—coffee + chocolate = bliss.
- Simple: Just a fork and zero shame—sometimes pure chocolate is all you need
Pro tip: Have toppings ready before baking—these beauties wait for no one
Storing and Reheating
Let’s be real—leftover chocolate lava cake is about as likely as finding a unicorn in your kitchen. But just in case you miraculously have batter left (or want to prep ahead), here’s what I’ve learned through many delicious trials:
Unbaked batter keeps beautifully in the fridge for up to 2 days. Just cover those filled ramekins tightly with plastic wrap—press it right onto the batter’s surface to prevent a skin from forming. When that chocolate craving hits, pop them straight from fridge to preheated oven (add 1-2 extra minutes to the bake time).
Now, about baked cakes—I don’t recommend reheating them. That molten center turns into regular cake when chilled and reheated. But if you must store one, wrap it tightly and microwave for 10-15 seconds max. It’ll still taste incredible, just without that signature lava flow. Better idea? Eat them fresh—I’ll happily volunteer as taste tester
Chocolate Lava Cake Variations
Once you’ve mastered the basic chocolate lava cake, the fun begins Try stirring a teaspoon of espresso powder into the melted chocolate for a mocha twist—it makes the chocolate taste even richer. For a citrusy surprise, add orange zest to the batter or serve with a Grand Marnier-spiked whipped cream. Peanut butter lovers can drop a small spoonful into each ramekin before baking—it’ll create a molten PB surprise in the center. The possibilities are endless, but my golden rule? Always keep that first batch pure—nothing beats the classic
Nutritional Information
Let’s be honest—when you’re digging into a warm chocolate lava cake, nutrition facts are probably the last thing on your mind But since we’re all grown-ups here, I’ll share the basics. These estimates are per serving (one glorious cake) and can vary based on your specific ingredients:
- Rich but reasonable: Each cake packs about 450 calories—totally worth it for that molten chocolate experience
- Decadent fats: Thanks to all that butter and chocolate, you’re looking at around 32g of fat per serving.
- Sweet but not crazy: About 25g of sugar—less than many store-bought desserts
Remember, these numbers shift based on your chocolate’s cacao percentage and whether you add ice cream (which, let’s be real, you absolutely should). Now stop analyzing and go enjoy that lava cake—you deserve every melty bite
Try this recipe tonight and tag me in your molten masterpieces—I’d love to see your chocolate lava triumphs
Can I use milk chocolate instead of dark?
You can, but I don’t recommend it for your first try. Milk chocolate makes the cakes sweeter and less intense—plus it behaves differently when baking. If you must substitute, use a high-quality milk chocolate and reduce the sugar slightly. But trust me, that bittersweet dark chocolate gives the perfect balance against the sweet molten center
Why didn’t my center stay molten?
Ah, the heartbreak This usually means one of three things: 1) The oven was too cool—make sure it’s fully preheated. 2) You baked them too long (even 1 extra minute can do it). 3) The ramekins were too small—4-6 oz is ideal. Next time, start checking at 10 minutes and pull them when the centers still jiggle slightly.
Can I make chocolate lava cakes ahead of time?
Absolutely, The batter keeps beautifully in the fridge for up to 2 days in covered ramekins—just add 1-2 minutes to the bake time since you’re starting with cold batter. For longer storage, freeze the filled ramekins (wrap tightly) for up to a month, then bake straight from frozen adding 3-4 extra minutes.
Can I make one big lava cake instead of individuals?
Technically yes, but it’s tricky The timing becomes unpredictable—you might get molten spots while other areas overcook. If you must try, use a 6-inch cake pan and start checking at 18 minutes. But honestly? Individual ramekins give you way more control over that perfect molten center in every bite
Follow us in Facebook
PrintChocolate Lava Cake Recipe: 30-Minute Molten Magic
A rich chocolate lava cake with a molten center, perfect for a decadent dessert.
- Prep Time: 15 minutes
- Cook Time: 12 minutes
- Total Time: 27 minutes
- Yield: 4 servings
- Category: Dessert
- Method: Baking
- Cuisine: French
- Diet: Vegetarian
Ingredients
- 1/2 cup unsalted butter (plus extra for greasing)
- 6 oz dark chocolate, chopped
- 2 large eggs
- 2 large egg yolks
- 1/4 cup granulated sugar
- 1/4 cup all-purpose flour
- 1/4 tsp salt
Instructions
- Preheat the oven to 425°F (220°C). Grease four ramekins with butter.
- Melt butter and chocolate in a double boiler. Stir until smooth.
- In a bowl, whisk eggs, egg yolks, and sugar until pale and thick.
- Fold the melted chocolate mixture into the egg mixture.
- Sift in flour and salt, then mix until just combined.
- Divide the batter evenly among the ramekins.
- Bake for 12-14 minutes until edges are set but center is still soft.
- Let cool for 1 minute, then invert onto plates and serve immediately.
Notes
- Use high-quality chocolate for the best flavor.
- Do not overbake—the center should remain molten.
- Serve with vanilla ice cream or whipped cream.


