You know those mornings when you’re running out the door, coffee in one hand and car keys in the other, realizing you forgot to eat? Yeah, I’ve been there too – way too many times. That’s why these freezer-friendly breakfast burritos became my secret weapon. Whip up a big batch on Sunday, stash them in the freezer, and boom – instant breakfast all week long. No more skipping meals or settling for sad drive-thru sandwiches. My kids call them “magic burritos” because they somehow make chaotic school mornings feel totally manageable. Trust me, once you try this system, you’ll wonder how you ever survived without it.
Table of Contents
Why You’ll Love These Freezer-Friendly Breakfast Burritos
These burritos are absolute game-changers, and here’s why:
- Morning lifesaver: 90 seconds in the microwave turns chaos into a hot, homemade breakfast – no cooking required
- Total customization: Swap ingredients based on what’s in your fridge (my kids love adding hash browns)
- Better than fast food: You control the quality – no mystery meat or soggy eggs here
- Meal prep magic: One cooking session = a whole month of stress-free mornings
- Portable perfection: Wrap it in foil and breakfast comes with you – no plate needed
Honestly, I think the best part is opening my freezer on a Tuesday morning and feeling like I’ve got my life together.
Ingredients for Freezer-Friendly Breakfast Burritos
Here’s everything you’ll need to make your morning superhero meal:
- 6 large eggs (trust me, large eggs make all the difference)
- 1/4 cup milk (whole milk makes them extra fluffy, but any works)
- 1 cup shredded cheddar cheese (the sharper the better in my opinion)
- 1/2 cup diced cooked ham (leftover rotisserie chicken works great too)
- 1/4 cup diced bell peppers (I use whatever color’s on sale)
- 1/4 cup diced onions (yellow or white both work perfectly)
- 1/2 cup cooked and crumbled breakfast sausage (the spicy kind if you’re feeling bold)
- 6 large flour tortillas (burrito-sized, about 10-inch diameter)
- 1 tablespoon olive oil (or butter if you’re feeling indulgent)
- Salt and pepper to taste (I’m generous with both)
Ingredient Notes and Substitutions
This recipe is basically a choose-your-own-adventure book. Swap turkey sausage for pork if you prefer, or go veggie with black beans instead. Not a cheddar fan? Pepper jack gives these burritos a nice kick. I often throw in handfuls of spinach or mushrooms when I’m feeling fancy – they freeze surprisingly well. Tortilla tip: look for ones without too many preservatives – they’ll reheat better without getting gummy.
Equipment Needed for Freezer-Friendly Breakfast Burritos
You probably already have everything you need, but let’s double-check:
- Large nonstick skillet (my trusty cast iron works great too)
- Mixing bowl (big enough for all those eggs)
- Whisk or fork (I always grab the whisk – makes fluffier eggs)
- Cutting board & sharp knife (for dicing those veggies)
- Aluminum foil or plastic wrap (for freezer wrapping – I prefer foil)
That’s it! No fancy gadgets required – just basic kitchen staples.
How to Make Freezer-Friendly Breakfast Burritos
Alright, let’s get cooking. This process is so simple you’ll be shocked at how much time it saves you later. I’ve made these dozens of times (okay, maybe hundreds), so I’ll walk you through every step to burrito perfection.
Step 1: Prepare the Egg Mixture
Crack those eggs into a big bowl – I like to do this one at a time in case any shells sneak in. Add the milk and whisk like you mean it. You want those eggs nice and frothy. Season with salt and pepper (I do about 1/2 tsp salt and 1/4 tsp pepper), then set this golden mixture aside.
Step 2: Cook the Vegetables
Heat your skillet over medium heat and add that tablespoon of olive oil. When it shimmers (that’s when you know it’s ready), toss in your diced peppers and onions. I love this part – the kitchen starts smelling amazing. Cook for about 3 minutes, stirring occasionally, until they’re just softened but still have some crunch.
Step 3: Scramble the Eggs
Now pour in that beautiful egg mixture you prepared earlier. Here’s my secret: don’t stir right away. Let the eggs set for about 30 seconds, then gently push them around with a spatula. Keep cooking and occasionally stirring until they’re just set – about 3 minutes total. Remember, they’ll keep cooking a bit from residual heat, so don’t overdo it.
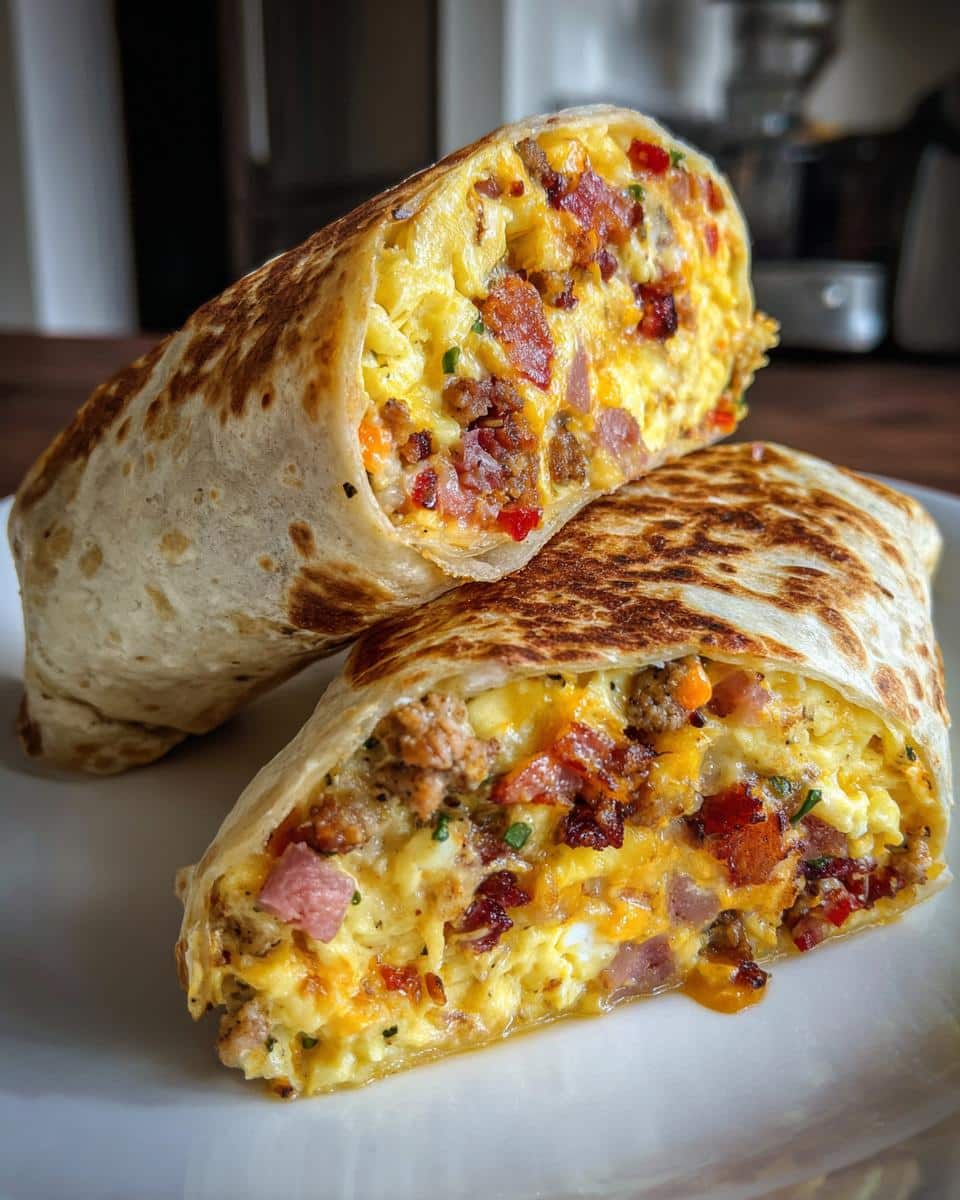
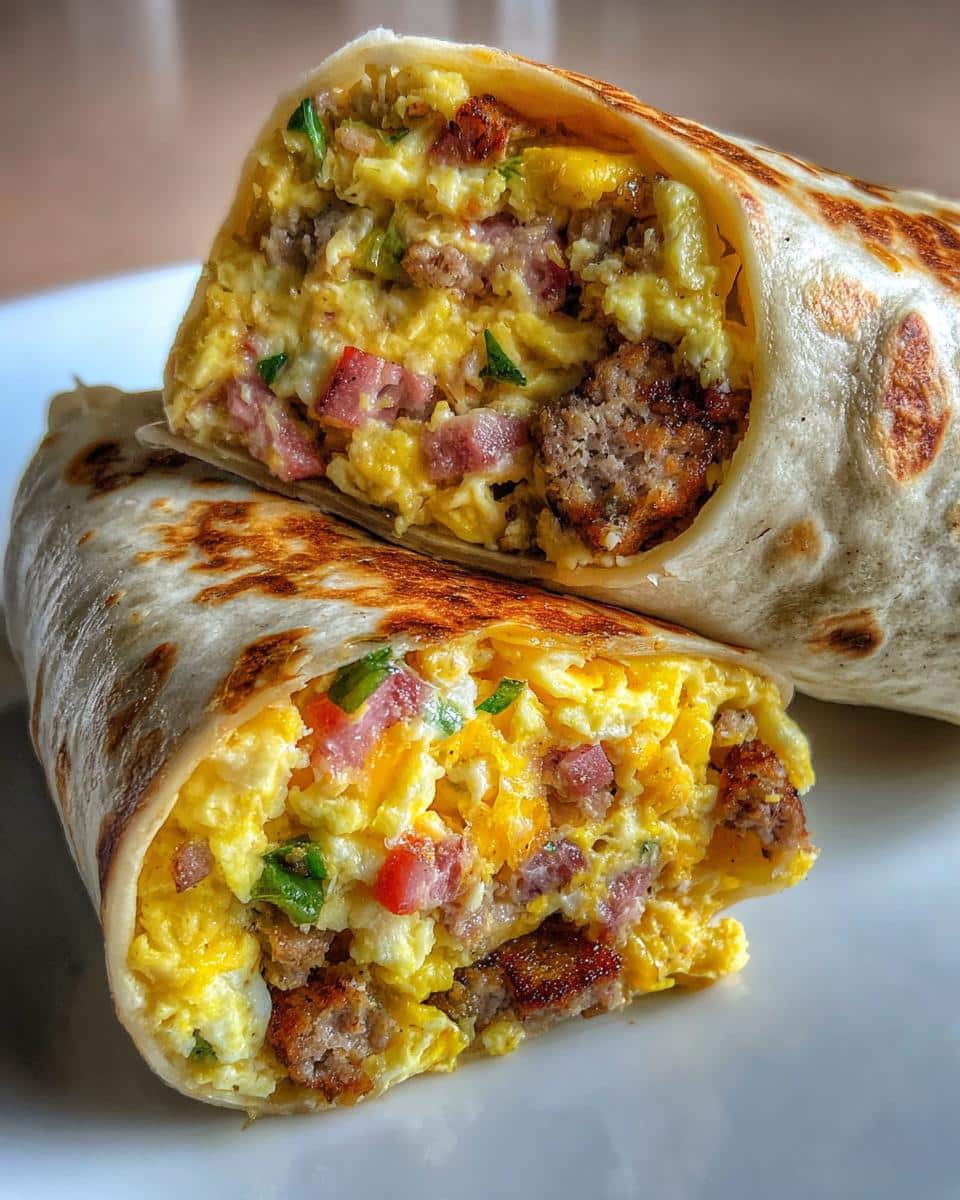
Step 4: Assemble the Burritos
Microwave your tortillas for about 20 seconds wrapped in a damp paper towel – this makes them super pliable so they won’t crack. Lay out a tortilla and spoon about 1/6th of the egg mixture down the center. Top with cheese (it acts like glue), then your meats. The key is to leave about 2 inches at each end for folding. Fold the sides in first, then roll from the bottom up tightly. If it feels loose, don’t worry – the filling will settle as it freezes.
Step 5: Freeze and Reheat
Wrap each burrito tightly in foil (I label mine with dates using a sharpie) or plastic wrap. They’ll keep beautifully in the freezer for up to 3 months. When hunger strikes, remove the foil (important), wrap in a paper towel, and microwave for 1.5-2 minutes. For that fresh-from-the-skillet taste, bake at 350°F for 20 minutes straight from frozen – the cheese gets all melty and the tortilla crisps up perfectly.
Tips for Perfect Freezer-Friendly Breakfast Burritos
Want to take your burritos to the next level? Here are my go-to tips: Use whole wheat tortillas for extra fiber and staying power. For ultimate crispiness, skip the microwave and reheat in the oven. And don’t overstuff them – a little space makes rolling easier and prevents leaks. Remember to label your burritos with dates so you always grab the freshest ones first. Trust me, these little tricks make a big difference!
Variations for Freezer-Friendly Breakfast Burritos
Oh friends, this is where the real fun begins. I’ve lost count of all the versions I’ve tried. Swap ham for crispy bacon crumbles – total game changer. Vegetarian? Black beans and roasted sweet potatoes make an awesome filling combo. My neighbor swears by adding tater tots (genius). Different cheeses transform the flavor too – try pepper jack for heat or Swiss for something milder. Got leftover grilled veggies from last night’s dinner? The beauty is that once you’ve got the basic egg-and-tortilla formula down, your imagination (and fridge contents) are the only limits.
Storage and Reheating Instructions for Freezer-Friendly Breakfast Burritos
Here’s the magic of these burritos – they’ll stay perfect in your freezer for up to 3 months. I wrap each one tightly in foil (shiny side in) or plastic wrap, then pop them in a freezer bag for extra protection against freezer burn. When you’re ready to eat, just remove the foil (trust me, I learned the hard way – microwaving foil is bad news), wrap in a damp paper towel, and microwave for 1.5-2 minutes. For that fresh-from-the-skillet crispiness, bake at 350°F for about 20 minutes straight from frozen – no thawing needed. They’re just as good as the day you made them.
Nutritional Information for Freezer-Friendly Breakfast Burritos
Here’s the scoop on what’s in these beauties (per burrito): About 350 calories, 20g protein, and 28g carbs to power your morning. But heads up – these numbers can vary based on your exact ingredients and tortilla choice. My advice? Enjoy the convenience and don’t stress the small stuff.
Frequently Asked Questions About Freezer-Friendly Breakfast Burritos
Can I use different fillings?
Absolutely, That’s the beauty of these burritos. I’ve used everything from leftover fajita veggies to crumbled bacon. Just keep fillings relatively dry – too much moisture can make tortillas soggy when reheating.
How long do they last in the freezer?
About 3 months is the sweet spot for quality. After that, they’re still safe to eat but might develop freezer burn. Pro tip: Write the date on each with a marker so you know which to eat first.
Can I make these vegetarian?
Definitely, Skip the meat and add sautéed mushrooms, spinach, or black beans. I sometimes mix in a spoonful of salsa for extra flavor – just blot it first to remove excess liquid.
Why do my tortillas crack when rolling?
They’re probably too cold. The 20-second microwave warm-up is crucial. If they still crack, try a different brand – some tortillas are more pliable than others.
What’s the best way to reheat?
For quick mornings, microwave is fine, but for that just-made taste? The oven can’t be beat. If you’re really in a pinch, toaster ovens work great too.
Follow us on Facebook for more delicious recipes.
Find more easy morning ideas in our web site.
PrintMagic Freezer-Friendly Breakfast Burritos in 5 Easy Steps

Make-ahead breakfast burritos that are perfect for busy mornings. Simply freeze and reheat when needed.
- Prep Time: 20 minutes
- Cook Time: 15 minutes
- Total Time: 35 minutes
- Yield: 6 burritos
- Category: Breakfast
- Method: Stovetop
- Cuisine: Mexican
- Diet: Low Lactose
Ingredients
- 6 large eggs
- 1/4 cup milk
- 1 cup shredded cheddar cheese
- 1/2 cup diced cooked ham
- 1/4 cup diced bell peppers
- 1/4 cup diced onions
- 1/2 cup cooked and crumbled breakfast sausage
- 6 large flour tortillas
- 1 tablespoon olive oil
- Salt and pepper to taste
Instructions
- Whisk the eggs and milk in a bowl. Season with salt and pepper.
- Heat olive oil in a skillet over medium heat. Add the bell peppers and onions, and cook until softened.
- Pour the egg mixture into the skillet. Stir gently until the eggs are scrambled and fully cooked.
- Warm the tortillas in the microwave for about 20 seconds to make them pliable.
- Assemble the burritos by placing a portion of the scrambled eggs, cheese, ham, and sausage onto each tortilla.
- Fold the sides of the tortilla over the filling, then roll it up tightly.
- Wrap each burrito individually in aluminum foil or plastic wrap.
- Store in the freezer for up to 3 months. Reheat in the microwave or oven when ready to eat.
Notes
- Customize the fillings to your preference.
- Use whole wheat tortillas for a healthier option.
- Reheat burritos in the oven for a crispier texture.