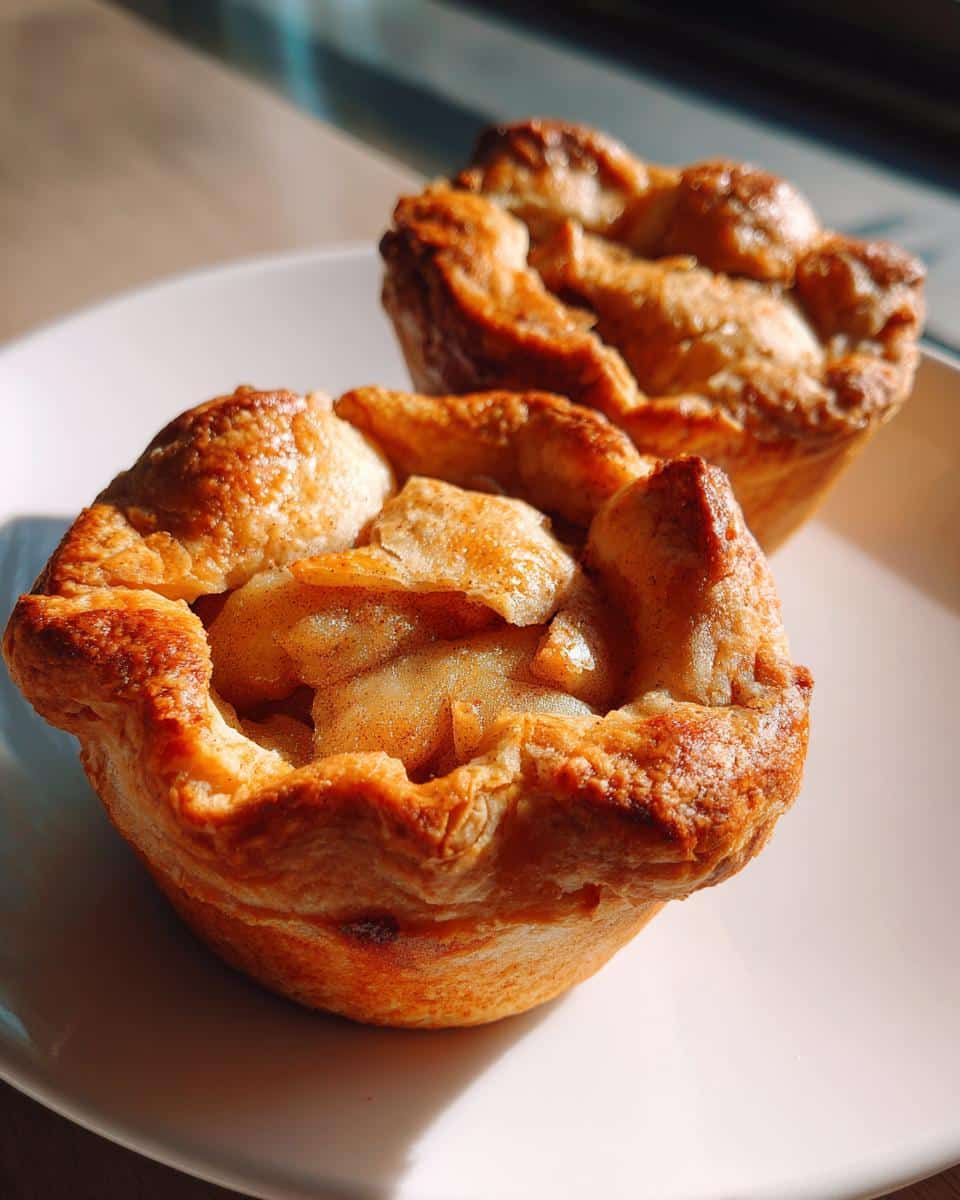
There’s something magical about pulling a tray of golden mini apple pies from the oven – that first whiff of cinnamon and buttery crust takes me straight back to my grandma’s kitchen. I was seven when she first let me press dough into muffin tins, carefully spooning in the spiced apple filling like we were making edible treasures. Now, decades later, these bite-sized wonders are still my go-to when I need a quick dessert that feels special. They’ve saved me at potlucks, wowed dinner guests, and become my secret weapon for turning ordinary weeknights into something sweet.
What I love most about mini apple pies is how they capture all the cozy flavors of a classic pie in perfectly portioned packages. No slicing required, no plates getting messy – just flaky crust and tender apples in every handheld bite. Over the years, I’ve tweaked my recipe to balance sweetness and spice just right, learning that cold butter and a light touch make all the difference in the crust. Whether you’re a seasoned baker or just starting out, these little pies are forgiving, fun to make, and guaranteed to make your kitchen smell like autumn no matter what season it is.
Table of Contents
Why You’ll Love These Mini Apple Pies
These adorable mini pies pack all the charm of their full-sized cousins with none of the hassle. Here’s why they’ve become my most requested recipe:
- Quick to make – Ready in under an hour from start to finish (most of that’s just baking time)
- Impossible to mess up – No fancy crimping skills needed, just press the dough into muffin tins
- Party perfect – No cutting means no messy plates, just grab-and-go sweetness for any gathering
- Kid-approved – Tiny hands love helping assemble them and they’re the ideal size for little appetites
- Freezer-friendly – Make a double batch and pop extras in the freezer for sweet emergencies
Trust me, once you taste that first warm bite of cinnamon-kissed apples wrapped in buttery crust, you’ll be hooked.
Ingredients for Mini Apple Pies
Gathering these simple ingredients is the first step to mini pie heaven. I always lay everything out before starting – it makes the process smoother and reminds me to keep that butter icy cold.
For the Perfect Flaky Crust:
- 2 cups all-purpose flour (spooned and leveled)
- 1/2 teaspoon salt – just enough to enhance all the flavors
- 2/3 cup cold butter, cubed (I pop mine in the freezer for 10 minutes first)
- 4-6 tablespoons ice water – yes, actual ice cubes floating in it
For the Spiced Apple Filling:
- 2 medium Granny Smith apples, peeled and finely diced (about 2 cups)
- 1/4 cup packed brown sugar – press it down in your measuring cup
- 1 teaspoon cinnamon – my secret is adding an extra pinch
- 1/2 teaspoon nutmeg – freshly grated if you’re feeling fancy
- 1 tablespoon lemon juice – keeps those apples from turning brown
- 1 tablespoon butter, cut into tiny pieces – for dotting the filling
Ingredient Notes & Substitutions
About those Granny Smith apples – their tartness balances the sweet filling perfectly, and they hold their shape when baked instead of turning mushy. In a pinch, Honeycrisp or Braeburn work too.
Ran out of brown sugar? You can use:
- White sugar plus 1 teaspoon molasses
- Pure maple syrup (reduce water by 1 tbsp)
- Honey (use 3 tbsp and reduce water slightly)
For gluten-free crust lovers, swap the all-purpose flour with your favorite 1:1 gluten-free blend. I’ve had great results with ones that include xanthan gum already mixed in.
And here’s my confession – sometimes when I’m really pressed for time, I’ll use pre-made pie dough. The homemade version tastes better, but we’ve all got those days.
How to Make Mini Apple Pies
Now for the fun part – let’s transform those simple ingredients into irresistible mini apple pies. I’ve broken it down into easy steps so you can nail it on your first try. Just follow along and soon you’ll be pulling golden, flaky little pies from your oven.
Step 1: Prepare the Pie Dough
This is where the magic starts – cold butter equals flaky layers, so don’t rush it. In a large bowl, whisk together the flour and salt. Now grab those icy butter cubes and work them into the flour with your fingers or a pastry cutter. Keep going until the mixture looks like coarse crumbs with some pea-sized butter bits remaining – those little pockets of fat will create perfect flakiness.
Drizzle in the ice water 1 tablespoon at a time, mixing gently with a fork just until the dough comes together when pressed. You might not need all the water – stop when it holds together without being sticky. Form it into a disk, wrap in plastic, and chill for at least 30 minutes (this relaxes the gluten and keeps the crust tender).
Step 2: Make the Apple Filling
While the dough chills, let’s prep those apples. Peel and dice them into small pieces (about 1/4-inch cubes) – remember, they need to fit nicely in our mini pies. Toss them immediately with the lemon juice to prevent browning.
In another bowl, mix the brown sugar, cinnamon, and nutmeg. Add the apples and stir until every piece is coated in that sweet, spicy goodness. The sugar will draw out some juice – that’s perfect. It’ll create a delicious syrup as the pies bake.
Step 3: Assemble and Bake
Preheat your oven to 375°F and grease a 12-cup muffin tin. Roll out the chilled dough to about 1/8-inch thickness on a lightly floured surface. Using a 3.5-inch round cutter (or a glass), cut out 12 circles for the bottoms. Press each into a muffin cup, letting the edges come slightly up the sides.
Fill each with about 2 tablespoons of apple mixture and dot with tiny pieces of butter. For tops, you can either cut smaller circles to place on top (poke a few vents) or get creative with lattice. Brush the tops with egg wash (1 egg + 1 tbsp water) for that gorgeous golden shine.
Bake for 20-25 minutes until the crust is golden and the filling is bubbly. Let them cool in the pan for 5 minutes, then carefully remove to a rack. Pro tip: Run a butter knife around the edges first to loosen them.
Tips for Perfect Mini Apple Pies
After making hundreds of these little gems (and yes, burning a batch or two along the way), I’ve picked up some foolproof tricks for mini pie success:
- Keep everything cold – Chill your dough again if it gets too soft while rolling. Warm dough = tough crust
- Don’t overfill – Leave about 1/4 inch at the top so filling doesn’t bubble over and make a sticky mess
- Check early – Ovens vary, so start checking at 18 minutes. Look for golden crust and bubbling apples
- Use the knife trick – If tops brown too fast, tent loosely with foil. The filling needs time to cook through
- Let them rest – Those 5 minutes of cooling time lets the filling set so it doesn’t gush out
See? Easy as… well, mini pie
Serving and Storing Mini Apple Pies
Oh, that magical moment when you pull these golden beauties from the oven. The best way to serve mini apple pies? Warm, of course – I like to time mine so they’re fresh from the oven when guests arrive. That heavenly scent of cinnamon and buttery crust becomes your best welcoming committee.
My favorite way to enjoy them is with a small scoop of vanilla ice cream melting over the top – the contrast of cold creaminess against the warm spiced apples is pure bliss. For a fancy brunch touch, try a dollop of freshly whipped cream and a sprinkle of cinnamon. My kids love them plain in their lunchboxes (though they rarely make it to lunch – I catch them sneaking extras for breakfast).
Storing leftovers (if you have any):
- Let cool completely, then keep in an airtight container at room temp for 2 days
- For longer storage, refrigerate up to 5 days – just reheat for 5 minutes in a 300°F oven to revive the crust’s crispness
- To freeze, arrange unbaked assembled pies on a tray until solid, then transfer to freezer bags for up to 3 months. Bake frozen, adding 5-7 extra minutes
One last pro tip – if you’re taking these to a party, line your container with parchment between layers. That way, the delicate crusts won’t stick together on the way.
Mini Apple Pies Nutritional Information
Now, I’m no nutritionist, but I do believe in knowing what’s going into our treats. These numbers are estimates per mini pie – because let’s be real, who stops at just one? I’ve calculated based on using all the ingredients listed, but remember, your exact numbers might vary slightly depending on apple size or how generous you are with that cinnamon.
| Serving Size: | 1 mini pie |
| Calories: | 180 |
| Sugar: | 10g |
| Sodium: | 120mg |
| Fat: | 9g |
| Saturated Fat: | 5g |
| Carbohydrates: | 24g |
| Fiber: | 2g |
| Protein: | 2g |
| Cholesterol: | 20mg |
A little secret? If you’re watching sugar, you can reduce it to 3 tablespoons in the filling – the apples are naturally sweet enough, especially if you let them caramelize a bit during baking. And that fiber from the apples and whole wheat flour (if you choose to substitute) makes these a slightly better-for-you treat.
FAQs About Mini Apple Pies
Can I use pre-made pie dough?
Absolutely, Store-bought dough works in a pinch. Just roll it thinner and cut to size. It won’t be quite as flaky as homemade, but it’s a great time-saver.
How do I prevent soggy bottoms?
Make sure your apples aren’t too wet before filling. Also, bake on the lower oven rack for the first 10 minutes to crisp up the crust.
Can I make these ahead of time?
Yes, Assemble them the night before and refrigerate. Just add 2-3 extra minutes to the bake time if they’re going in cold.
What’s the best way to reheat them?
Pop them in a 300°F oven for 5-7 minutes. Avoid the microwave unless you love soft crusts.
Can I freeze mini apple pies?
Definitely, Freeze them unbaked on a tray first, then transfer to bags. Bake frozen, adding 5-7 extra minutes.
Share Your Mini Apple Pies
There’s nothing I love more than seeing your mini apple pie creations come to life. Whether it’s your first time making them or you’ve put your own spin on the recipe, I want to celebrate your baking wins with you. Snap a photo when you pull those golden beauties from the oven – I know they’ll look amazing.
Tag me on Instagram @MyMiniPieAdventures or use #MiniApplePieMagic so I can cheer you on and maybe even feature your masterpiece. Did you try a fun variation? Maybe you added caramel drizzle or experimented with different apple varieties? I’m all ears for your brilliant ideas.
And if you loved this recipe as much as I do, please consider leaving a star rating below – it helps other bakers find their way to these bite-sized treats. Happy baking, friends. Can’t wait to see what you create. You can also follow us on Facebook for more delicious recipes.
For more delicious recipes and updates, follow us on Facebook
Find more easy morning ideas in our web site.
PrintIrresistible 12 Mini Apple Pies Recipe for Any Occasion

Mini apple pies are bite-sized desserts filled with spiced apples and baked in a flaky crust.
- Prep Time: 30 minutes
- Cook Time: 25 minutes
- Total Time: 55 minutes
- Yield: 12 mini pies
- Category: Dessert
- Method: Baking
- Cuisine: American
- Diet: Vegetarian
Ingredients
- 2 cups all-purpose flour
- 1/2 tsp salt
- 2/3 cup cold butter, cubed
- 4–6 tbsp ice water
- 2 medium apples, peeled and diced
- 1/4 cup sugar
- 1 tsp cinnamon
- 1/2 tsp nutmeg
- 1 tbsp lemon juice
- 1 tbsp butter (for filling)
Instructions
- Mix flour and salt in a bowl.
- Cut in cold butter until crumbly.
- Gradually add ice water until dough forms.
- Chill dough for 30 minutes.
- Preheat oven to 375°F.
- Toss apples with sugar, cinnamon, nutmeg, and lemon juice.
- Roll out dough and cut into circles.
- Press circles into muffin tins.
- Fill with apple mixture and dot with butter.
- Cover with smaller dough circles or lattice.
- Bake for 20-25 minutes or until golden.
Notes
- Use Granny Smith apples for best texture.
- Chill dough before rolling for easier handling.
- Brushing crust with egg wash gives a golden finish.


