Oh my gosh, you have to try these no-bake mini cheesecake cups. They’re my go-to when I need a quick, impressive dessert that won’t heat up my kitchen. I first made them for my niece’s birthday party when I realized (oops) I’d forgotten to bake her cake. These little lifesavers came together in minutes, and guess what? The kids went crazy for their own personal cheesecakes. No oven required, just a few simple ingredients, and you’ve got the perfect portion-controlled treat. They’re creamy, dreamy, and totally customizable with your favorite toppings.
Table of Contents
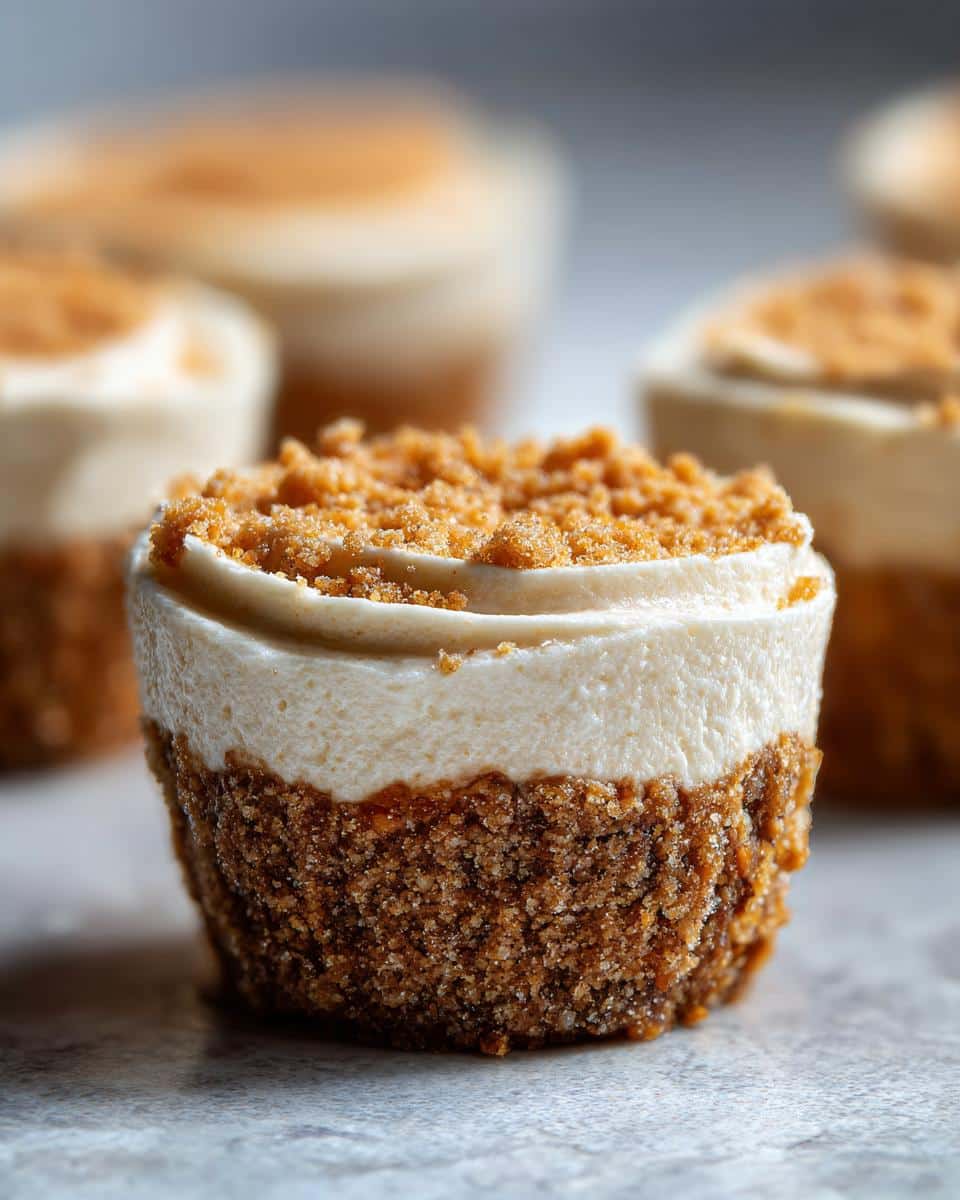
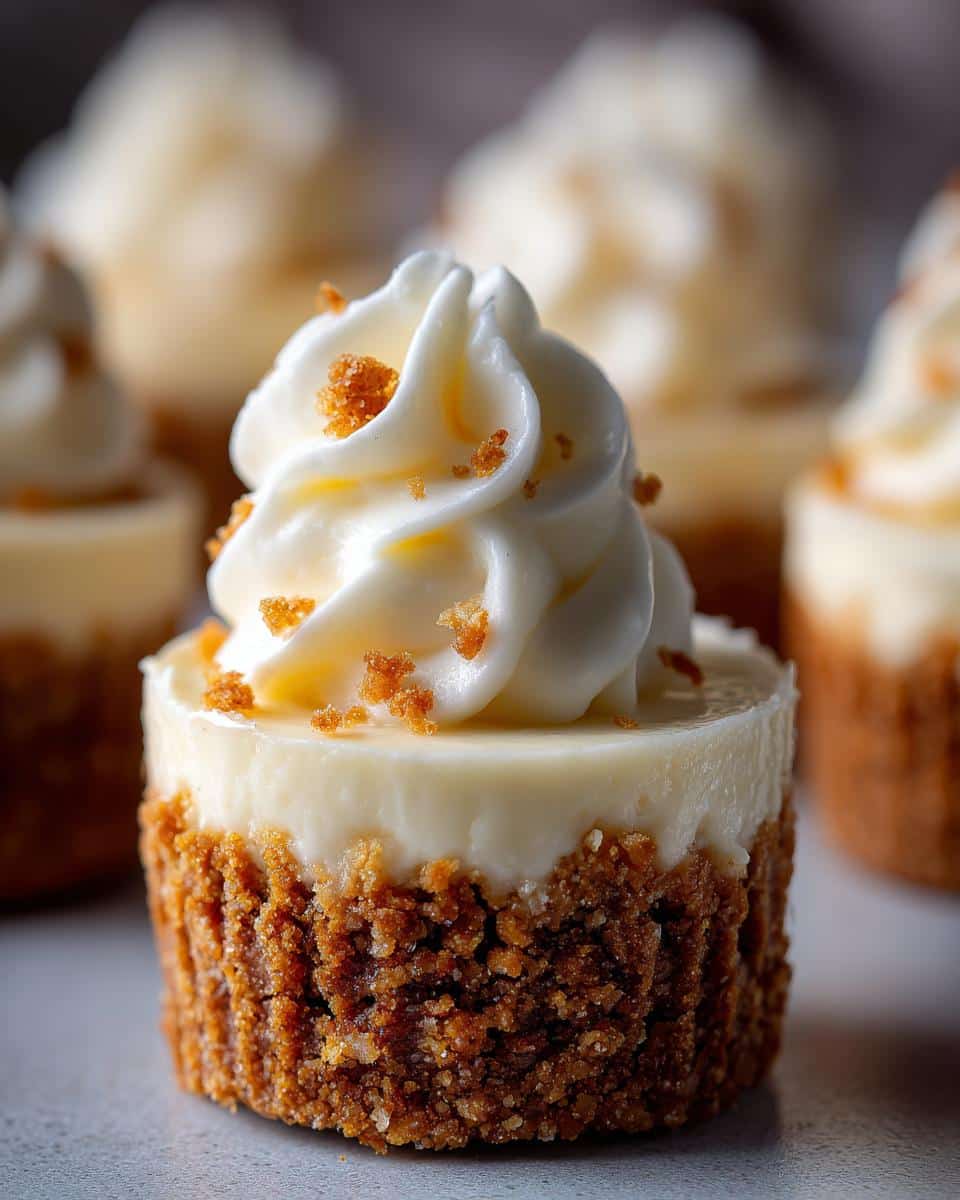
Irresistible No-Bake Mini Cheesecake Cups in 20 Minutes

Easy no-bake mini cheesecake cups made with a graham cracker crust and creamy filling. Perfect for portion control and quick desserts.
- Prep Time: 15 minutes
- Cook Time: 0 minutes
- Total Time: 2 hours 15 minutes
- Yield: 12 mini cheesecakes
- Category: Dessert
- Method: No-Bake
- Cuisine: American
- Diet: Vegetarian
Ingredients
- 1 cup graham cracker crumbs
- 3 tbsp melted butter
- 1 tbsp sugar
- 8 oz cream cheese, softened
- 1/4 cup sour cream
- 1/2 cup powdered sugar
- 1 tsp vanilla extract
- 1 cup whipped cream
Instructions
- Mix graham cracker crumbs, melted butter, and sugar until combined.
- Press 1 tbsp of the mixture into the bottom of each mini cupcake liner.
- Beat cream cheese, sour cream, powdered sugar, and vanilla until smooth.
- Fold in whipped cream gently.
- Spoon filling over crusts and refrigerate for at least 2 hours.
- Top with fruit or chocolate before serving.
Notes
- Use room temperature cream cheese for smoother filling.
- Chill crust for 10 minutes before adding filling for better texture.
- Store in the refrigerator for up to 3 days.
Why You’ll Love These No-Bake Mini Cheesecake Cups
Trust me, these little cheesecakes are a game-changer. Here’s why you’ll adore them:
- Quick & Easy: No oven, no stress. They come together in under 20 minutes of prep.
- Perfect Portions: Each cup is just the right size for a sweet treat without overindulging.
- Customizable: Top them with fresh fruit, chocolate, or caramel—whatever you’re craving.
- Crowd-Pleaser: Guests love having their own individual desserts, and they’re great for parties.
- Make-Ahead Magic: Just chill them, and they’re ready whenever you need them.
Seriously, they’re the ultimate fuss-free dessert that everyone will rave about.
Ingredients for No-Bake Mini Cheesecake Cups
Here’s everything you’ll need to make these irresistible little treats. I’m super picky about my ingredients – trust me, these small details make a BIG difference in the final result.
- 1 cup graham cracker crumbs (packed slightly – I use the bottom of my measuring cup to press them down)
- 3 tbsp melted butter (salted or unsalted both work, but I prefer salted for that extra flavor kick)
- 1 tbsp granulated sugar (just a touch to sweeten the crust – you can skip it if you prefer)
- 8 oz cream cheese (full-fat, softened COMPLETELY – leave it out for at least 2 hours, no cheating)
- 1/4 cup sour cream (this is my secret for extra creamy texture)
- 1/2 cup powdered sugar (sifted if yours is lumpy – I learned this the hard way after one lumpy batch)
- 1 tsp pure vanilla extract (the good stuff makes all the difference – none of that imitation vanilla here)
- 1 cup whipped cream (I use homemade, but the stuff from the can works in a pinch – just don’t tell Grandma)
See? Simple ingredients you probably already have. Just make sure everything’s at room temperature before you start – except the butter, which needs to be melted but slightly cooled. I can’t wait for you to try these.
Equipment You’ll Need
Don’t worry—you don’t need fancy gadgets for these no-bake cheesecake cups. Just grab these basic kitchen tools (I bet most are already in your drawers):
- Mini muffin tin (standard size works too if you want slightly bigger cheesecakes)
- Mini cupcake liners (foil ones hold their shape best, but paper works too—just spritz them lightly with cooking spray)
- Mixing bowls (one medium for the crust, one large for the filling—I use my trusty stainless steel set)
- Electric mixer (handheld is perfect for this—though a stand mixer works if you’re feeling fancy)
- Spatula (for scraping every last bit of that delicious filling—waste not, want not)
- Measuring cups & spoons (my 1/4 cup always disappears—check under the couch cushions if yours is missing too)
That’s it, No special equipment needed. Just grab these basics, and you’re ready to make magic happen. Oh, and don’t forget the fridge space—these little guys need to chill out for a bit before the party starts.
How to Make No-Bake Mini Cheesecake Cups
Ready to whip up these little bites of heaven? Let’s break it down step by step. Don’t worry—it’s so easy, even my 10-year-old niece can do it (and she’s my official taste tester). Follow these instructions, and you’ll have perfect no-bake cheesecake cups in no time.
Step 1: Prepare the Graham Cracker Crust
First things first—let’s make that crust, In a medium bowl, mix the graham cracker crumbs, melted butter, and sugar until it looks like wet sand. If it’s too dry, add a tiny bit more butter (but don’t overdo it—you don’t want a greasy crust).
Now, grab your mini cupcake liners and press about 1 tablespoon of the mixture into the bottom of each one. I use the bottom of a small glass or measuring cup to pack it down firmly—this keeps the crust from crumbling later. If you’ve got time, pop the crusts in the fridge for 10 minutes to set. It’s not mandatory, but it does make them extra sturdy.
Step 2: Make the Cheesecake Filling
Here’s where the magic happens, In a large bowl, beat the softened cream cheese until it’s smooth and creamy—no lumps allowed. Add the sour cream, powdered sugar, and vanilla, and mix until everything’s combined and silky. Taste it (chef’s privilege) and adjust the sweetness if needed.
Now, gently fold in the whipped cream. This is the secret to that light, fluffy texture. Use a spatula and fold in a figure-eight motion—don’t overmix, or your filling will lose its airiness. Trust me, it’s worth taking your time here.
Step 3: Assemble and Chill
Time to bring it all together. Spoon the cheesecake filling over the crusts, filling each liner almost to the top. I like to use a small cookie scoop for this—it’s less messy, and you get even portions. Smooth the tops with the back of a spoon or a butter knife.
Pop the tray in the fridge and let them chill for at least 2 hours. I know it’s tempting to sneak one early, but patience is key here—they need time to set. When they’re firm and ready, add your favorite toppings and enjoy.
Tips for Perfect No-Bake Mini Cheesecake Cups
Alright, let me share all my hard-earned secrets for cheesecake success. I’ve made these little cups more times than I can count (my waistline can attest to that), and these tips will help you avoid all the mistakes I made along the way.
Room temperature is EVERYTHING: I can’t stress this enough—your cream cheese MUST be softened properly. Take it out at least 2 hours before baking. If you’re impatient like me sometimes, you can microwave it for 10-second bursts, but be careful. Overheated cream cheese turns grainy, and nobody wants that texture.
Fold, don’t mix: When adding the whipped cream to your filling, treat it like you’re handling a sleeping baby—gentle and slow. Use a spatula and fold just until combined. Overmixing will deflate all that lovely airiness we worked so hard to achieve.
Crumb crust tricks: If your graham cracker crust isn’t holding together, you might need a smidge more butter. Test it by squeezing some in your hand—if it holds its shape, you’re golden. And always pack it firmly into the liners—I use the bottom of a shot glass for perfect compression.
The chill factor: These babies need proper chilling time—don’t rush it. At least 2 hours in the fridge, but overnight is even better. If you’re in a real hurry, you can pop them in the freezer for 30 minutes, but let them sit at room temperature for a few minutes before serving.
Topping timing: If you’re adding fresh fruit or sauces, wait until right before serving. Berries can make the tops soggy if they sit too long. For chocolate lovers, a quick drizzle of melted chocolate at the end looks fancy with zero effort.
Remember—even if yours don’t turn out picture-perfect the first time (mine sure didn’t), they’ll still taste amazing. Baking is all about having fun and enjoying the process—and eating the results, of course.
Variations for No-Bake Mini Cheesecake Cups
Oh, the possibilities are endless with these little cuties. One of my favorite things about this recipe is how easily you can switch up the flavors. Here are some of my go-to variations that always impress:
Lemon Berry Bliss: Add 1 teaspoon of lemon zest to the filling for a bright, fresh twist. Top with a single raspberry or blueberry—the tartness pairs perfectly with the creamy cheesecake. I made these for a summer BBQ last year, and they disappeared before I could snap a photo.
Chocolate Lover’s Dream: Stir 2 tablespoons of cocoa powder into the filling (sift it first to avoid lumps) and use Oreo crumbs instead of graham crackers for the crust. Top with mini chocolate chips or a drizzle of melted chocolate. My nephew claims these are “better than real cake”—high praise from a 12-year-old.
Peanut Butter Cup: Mix 2 tablespoons of smooth peanut butter into the filling (warm it slightly first so it blends easily). For the crust, try crushed Nilla wafers mixed with melted butter. Top with a tiny Reese’s piece—trust me, you’ll want to make a double batch.
Mocha Madness: Dissolve 1 teaspoon instant espresso powder in the vanilla extract before adding it to the filling. Use chocolate graham crackers for the crust and dust with cocoa powder before serving. Perfect for when you need a dessert that doubles as a caffeine boost.
The best part? You can make a few different flavors in one batch—just divide the filling and mix in different add-ins. I love setting up a “cheesecake bar” with little bowls of toppings and letting guests customize their own. Watch out though—this usually leads to requests for the recipe.
Serving Suggestions
Oh man, this is where the real fun begins. These little cheesecake cups are like blank canvases just waiting for your creative touch. Here are my all-time favorite ways to dress them up:
- Berry Bonanza: A single perfect raspberry or a few blueberries on top—so simple yet so elegant. For special occasions, I’ll do a mix of all the berries and dust with powdered sugar. The colors pop against the creamy white filling.
- Caramel Drizzle: Warm up some caramel sauce (I cheat and use the jarred kind) and zigzag it over the tops. Sprinkle with sea salt if you’re feeling fancy—that sweet-salty combo is to die for.
- Chocolate Lover’s Delight: Melt chocolate chips with a bit of coconut oil and drizzle away. Mini chocolate chips, crushed Oreos, or even a whole Hershey’s kiss plopped right on top work magic.
- Fruit Fiesta: My summer go-to is diced mango or peaches. In fall, I’ll sauté apples with cinnamon and spoon them over. The fruit juices soak into the cheesecake just a bit—heaven.
Pro tip: Let guests add their own toppings. I’ll set up little bowls with all the options—it makes dessert interactive and keeps the cheesecakes looking fresh until serving time. Watch how fast these disappear when everyone gets to customize their own.
Storage and Reheating
Okay, confession time—these rarely last more than a day in my house because we devour them so fast. But when I do manage to save some (usually by hiding them behind the milk carton), here’s how I keep them fresh:
Pop those little cheesecake cups in an airtight container—I swear by my glass snapware with the rubber seals—and they’ll stay perfect in the fridge for up to 3 days. The crust might soften slightly by day 3, but the flavor just gets better. Pro tip: Separate layers with parchment paper if you’re stacking them so the toppings don’t smush.
Now, about reheating—you won’t need to. These are meant to be enjoyed cold straight from the fridge. If you accidentally left them out too long and they got soft, just pop them back in the fridge for 30 minutes to firm up again. No oven required—that’s the beauty of no-bake desserts.
Want to plan ahead? You can freeze them too. Just skip any fresh fruit toppings, wrap each cup tightly in plastic wrap, then store in a freezer bag for up to 1 month. Thaw overnight in the fridge—they’ll taste just as creamy as the day you made them. My freezer always has a secret stash for last-minute cravings.
Nutritional Information
Let’s be real—we’re not eating cheesecake for the health benefits, but it’s always good to know what you’re enjoying. These nutrition facts are estimates per mini cheesecake (because let’s face it, no one stops at just one). I calculated them using my trusty food scale and nutrition app, but your exact numbers might vary slightly depending on brands and how generous you are with toppings.
- Calories: 180 (worth every single one)
- Fat: 12g (7g saturated—that’s the cream cheese doing its delicious work)
- Carbohydrates: 15g (12g sugars—mostly from the graham crackers and powdered sugar)
- Protein: 2g (surprising protein boost from the cream cheese and sour cream)
- Sodium: 120mg
- Cholesterol: 35mg
A little disclaimer: These numbers don’t include toppings (because who can resist adding berries or chocolate?). If you’re watching your sugar, you can reduce the powdered sugar by half—the cheesecakes will still taste amazing, just slightly less sweet. And remember, portion control is built right in with these mini cups—though I won’t judge if you “accidentally” eat three.
Frequently Asked Questions
Can I Use a Different Crust?
Absolutely, The graham cracker crust is classic, but don’t feel boxed in. My favorite alternatives are:
* Oreo crumbs: Just scrape out the filling first (or leave it in for extra richness)—use the same amount as graham crackers. Chocolate and cheesecake? Yes please.
* Shortbread cookies: Crushed up shortbread makes such a buttery, delicate crust. Perfect for fancy tea parties.
* Gluten-free options: Any gluten-free cookie or graham cracker works great—I’ve used gluten-free animal crackers with amazing results.
* Nilla wafers: These give a lovely vanilla flavor that pairs beautifully with fruit toppings.
The rule of thumb? Whatever you use, keep the same 1:3 ratio—1 tbsp sugar to 3 tbsp melted butter per cup of crumbs. Easy peasy.
How Long Do They Last in the Fridge?
Here’s the scoop—these babies stay fresh in the fridge for up to 3 days, but they’re best eaten within 48 hours for optimal texture. The crust will start softening after day 2, but the flavor actually improves. Just keep them in an airtight container (I stack them carefully with parchment between layers).
Pro tip: If you’re making them ahead for a party, wait to add fresh fruit toppings until right before serving—the juices can make the tops soggy if they sit too long. Berries especially like to misbehave if left unattended.
These Irresistible No-Bake Mini Cheesecake Cups deliver elegant individual desserts in just 20 minutes—perfect for parties, gifts, or satisfying a sweet craving. If you love easy no-bake treats, you’ll also enjoy our No-Bake Pumpkin Cheesecake or our Creamy Chocolate Mousse. We’d love to see your beautiful creations—share them with us on Pinterest Find more effortless sweets in our dessert recipes collection.


