There’s something magical about Halloween baking, and these Ghost Meringue Cookies are my absolute favorite spooky treat to whip up. Light, airy, and just a little bit haunting, they’re the perfect way to add some fun to your Halloween spread. I’ve been making these for years, and they always steal the show—kids love them, adults can’t resist them, and honestly, they’re so easy, you’ll wonder why you haven’t made them before. Plus, there’s something so satisfying about piping little ghost shapes and giving them adorable (or scary) faces. Trust me, these cookies will have everyone saying, “Boo!” in the best way possible.
Table of Contents
Why You’ll Love Ghost Meringue Cookies
These little ghosts aren’t just adorable—they’re a total win for so many reasons. Here’s why they’ve become my go-to Halloween treat:
- So easy to make: Just a handful of ingredients and a little piping magic, and you’ve got spooky perfection.
- Light as a ghost: Crisp on the outside, melt-in-your-mouth airy—no heavy Halloween sugar crash here.
- Endless fun decorating: Give them silly smiles, spooky scowls, or even little bat-wing arms if you’re feeling creative.
- Perfect make-ahead treat: Bake them a day or two before your party—they stay crisp in an airtight container.
- Always a crowd-pleaser: Kids giggle, adults sneak seconds, and everyone loves a cookie that looks as fun as it tastes.
Ingredients for Ghost Meringue Cookies
Here’s what you’ll need to bring these spooky little ghosts to life—trust me, every ingredient has a job to do:
- 4 large egg whites: Room temp is best—they whip up fluffier than cold ones. And make sure no yolks sneak in.
- 1 cup granulated sugar: Superfine works great if you have it, but regular sugar will do—just beat it a smidge longer.
- 1/4 tsp cream of tartar: The secret weapon for stiff, glossy peaks that hold their shape.
- 1/2 tsp vanilla extract: Pure, not imitation—it gives that warm, cozy flavor behind the sweetness.
- Black gel food coloring: The only way to draw those perfect ghostly faces without making a runny mess.
How to Make Ghost Meringue Cookies
Ready to get spooky? Let’s turn those ingredients into the cutest little ghost cookies you’ve ever seen. Follow these steps, and you’ll have a hauntingly good batch in no time.
Step 1: Prep the Meringue
First, preheat your oven to 200°F (95°C)—low and slow is the key here. Grab a clean, dry bowl (any grease or water will ruin your meringue) and beat the egg whites with the cream of tartar until you get soft peaks. Then, slowly add the sugar, a little at a time, while beating. Keep going until you’ve got stiff, glossy peaks that hold their shape. This is your meringue base, so don’t rush it—patience pays off.
Step 2: Pipe and Decorate
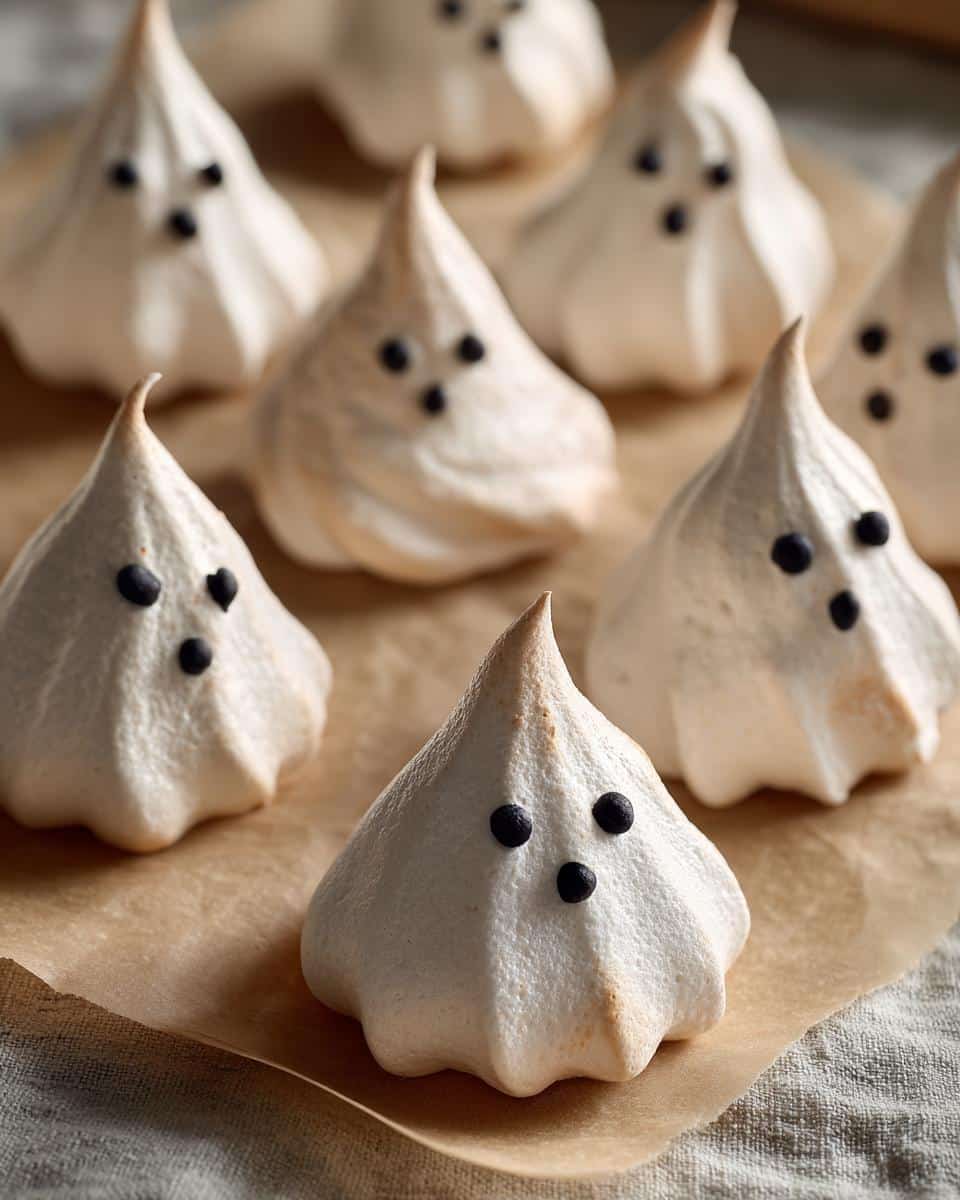
Now for the fun part, Transfer your meringue to a piping bag fitted with a round tip. Pipe little ghost shapes onto a parchment-lined baking sheet—think of them as little blobs with a slight point at the top for the “head.” Once they’re all piped, grab your black gel food coloring and carefully draw eyes and mouths. Pro tip: less is more with the faces—tiny dots and simple smiles look the cutest.
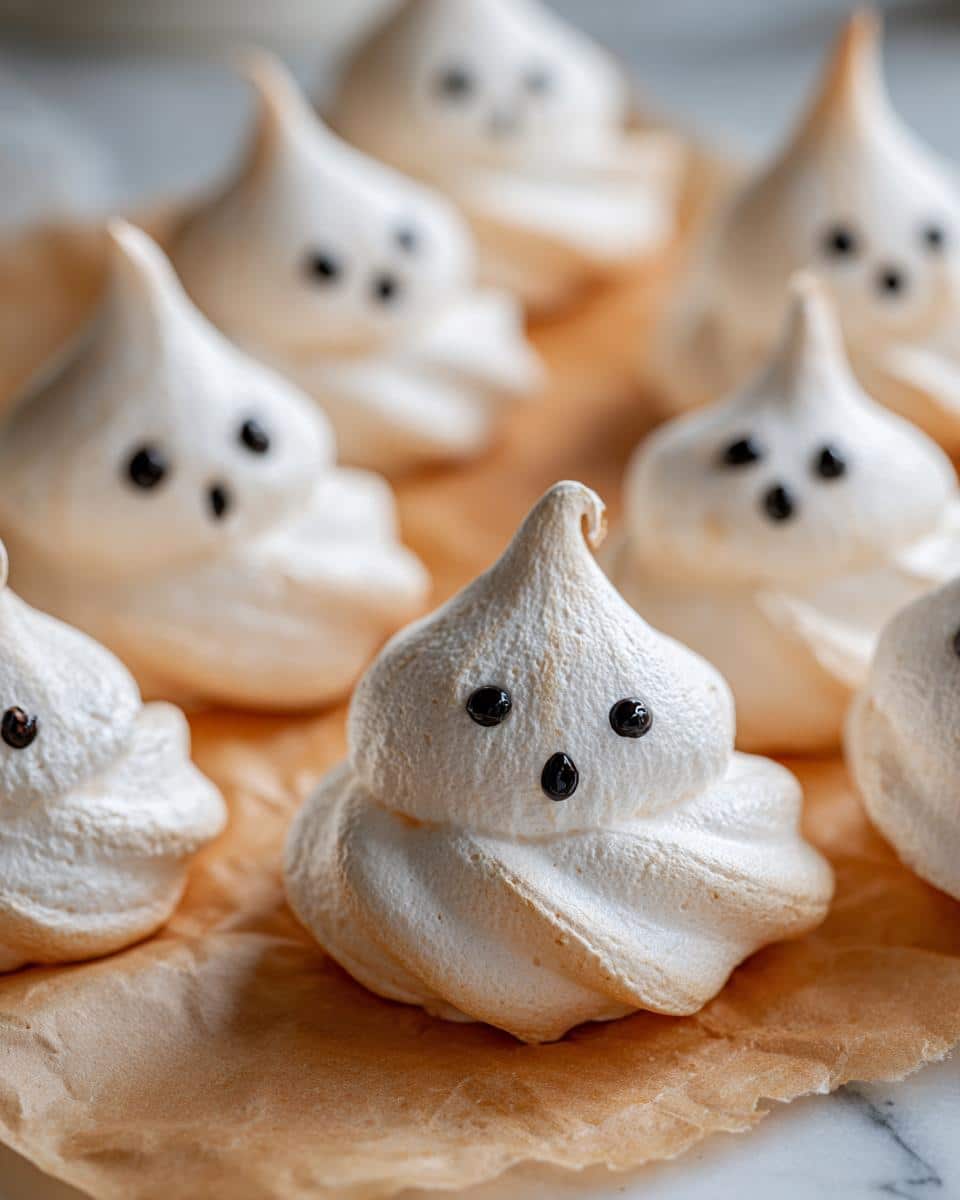
Step 3: Bake and Cool
Pop those ghosts into the oven and bake for 1.5 to 2 hours. Resist the urge to open the oven door—cold air can make them collapse. When they’re done, they should be dry and crisp. Let them cool completely on the baking sheet before serving. Trust me, the wait is worth it for that perfect, airy crunch.
Tips for Perfect Ghost Meringue Cookies
These little ghosts can be tricky, but I’ve learned a few tricks over the years to make sure they turn out perfectly every time. First, spotless tools are non-negotiable—any grease in your bowl or on your beaters will sabotage those stiff peaks. I wipe everything down with lemon juice or vinegar just to be safe. Second, patience is key—don’t rush the beating or baking process. And finally, store them in an airtight container as soon as they’re cool, or humidity will turn them sticky. Oh, and hide . few for yourself—they disappear faster than a ghost in the night.
Variations for Ghost Meringue Cookies
Who says ghosts have to be white? Switch things up with these fun twists—perfect for when you want to get extra creative. Try pink ghosts for a Valentine’s Day spook, or add a drop of peppermint extract for a festive winter twist. You could even pipe them into tiny bats or pumpkins if ghosts aren’t your thing. The best part? The basic recipe stays the same—just tweak the colors and flavors to match any occasion. My personal favorite? A dash of cocoa powder for “dirty ghosts” with chocolatey undertones. Boo-tiful.
Serving and Storing Ghost Meringue Cookies
These little ghosts deserve a spooky-good presentation. Pile them on a black platter for maximum Halloween vibes, or stick them in mini cupcake liners for easy grabbing. To keep them crisp, store them in an airtight container at room temperature—they’ll stay perfect for up to a week (if they last that long). Just avoid the fridge—humidity is a ghost’s worst enemy.
Nutritional Information for Ghost Meringue Cookies
These little ghosts are light as air—literally. Each cookie has about 25 calories and 5g sugar. Exact values vary slightly based on ingredients, but hey, they’re practically guilt-free. Boo-tiful.
FAQs About Ghost Meringue Cookies
Can I make these ahead of time?
Absolutely, These cookies are perfect for prepping in advance. Bake them a day or two before your event and store them in an airtight container at room temperature. They’ll stay crisp and ready to haunt your Halloween spread.
Why did my meringues collapse?
Oh no, This usually happens if there’s grease in your bowl or on your beaters, or if you open the oven door too soon. Make sure your tools are spotless and resist the urge to peek—patience is key with meringues.
Can I use liquid food coloring for the faces?
Stick with gel. Liquid food coloring can make your meringue runny, and nobody wants a ghost with a melted face. Gel gives you sharp, clean lines without messing up the texture.
How do I know when they’re done baking?
They should be dry and crisp to the touch. If they’re still soft or sticky, give them a little more time in the oven. Remember, low and slow is the way to go.
Can I make these gluten-free?
You’re in luck—these cookies are naturally gluten-free. Just double-check that your ingredients (like vanilla extract) are certified gluten-free if needed. Boo-yah.
For more fun recipes and updates, follow us on Facebook.
Find more easy morning ideas in our web site.
PrintSpooky Ghost Meringue Cookies in 3 Easy Steps

Ghost Meringue Cookies are a fun and spooky treat perfect for Halloween. These light and airy cookies are easy to make and can be decorated to look like little ghosts.
- Prep Time: 20 minutes
- Cook Time: 2 hours
- Total Time: 2 hours 20 minutes
- Yield: 24 cookies
- Category: Dessert
- Method: Baking
- Cuisine: American
- Diet: Vegetarian
Ingredients
- 4 large egg whites
- 1 cup granulated sugar
- 1/4 teaspoon cream of tartar
- 1/2 teaspoon vanilla extract
- Black gel food coloring
Instructions
- Preheat your oven to 200°F (95°C) and line a baking sheet with parchment paper.
- In a clean, dry bowl, beat the egg whites and cream of tartar until soft peaks form.
- Gradually add the sugar while continuing to beat until stiff peaks form.
- Mix in the vanilla extract.
- Transfer the meringue to a piping bag fitted with a round tip.
- Pipe ghost shapes onto the prepared baking sheet.
- Use black gel food coloring to draw eyes and mouths on the ghosts.
- Bake for 1.5 to 2 hours, or until the meringues are dry and crisp.
- Let cool completely before serving.
Notes
- Make sure your bowl and beaters are completely clean and dry before beating the egg whites.
- Do not open the oven door while the meringues are baking, as this can cause them to collapse.
- Store the cookies in an airtight container to keep them crisp.


