There’s nothing like a tray of warm, cheesy Chicken Parmesan Sliders to make any gathering feel special. I first made these for my husband’s football watch party years ago, and now they’re the most requested dish whenever friends come over. Seriously, I don’t think I’ve hosted a game day without these sliders since.
What makes them so perfect? First, they’re ridiculously easy to throw together – we’re talking 10 minutes of prep, tops. Second, that magical combo of crispy chicken, tangy marinara, and melty cheese wrapped in soft slider buns makes everyone go crazy for seconds (and thirds). Last Sunday, my neighbor texted me at halftime asking for the recipe because her kids devoured six sliders each.
Table of Contents
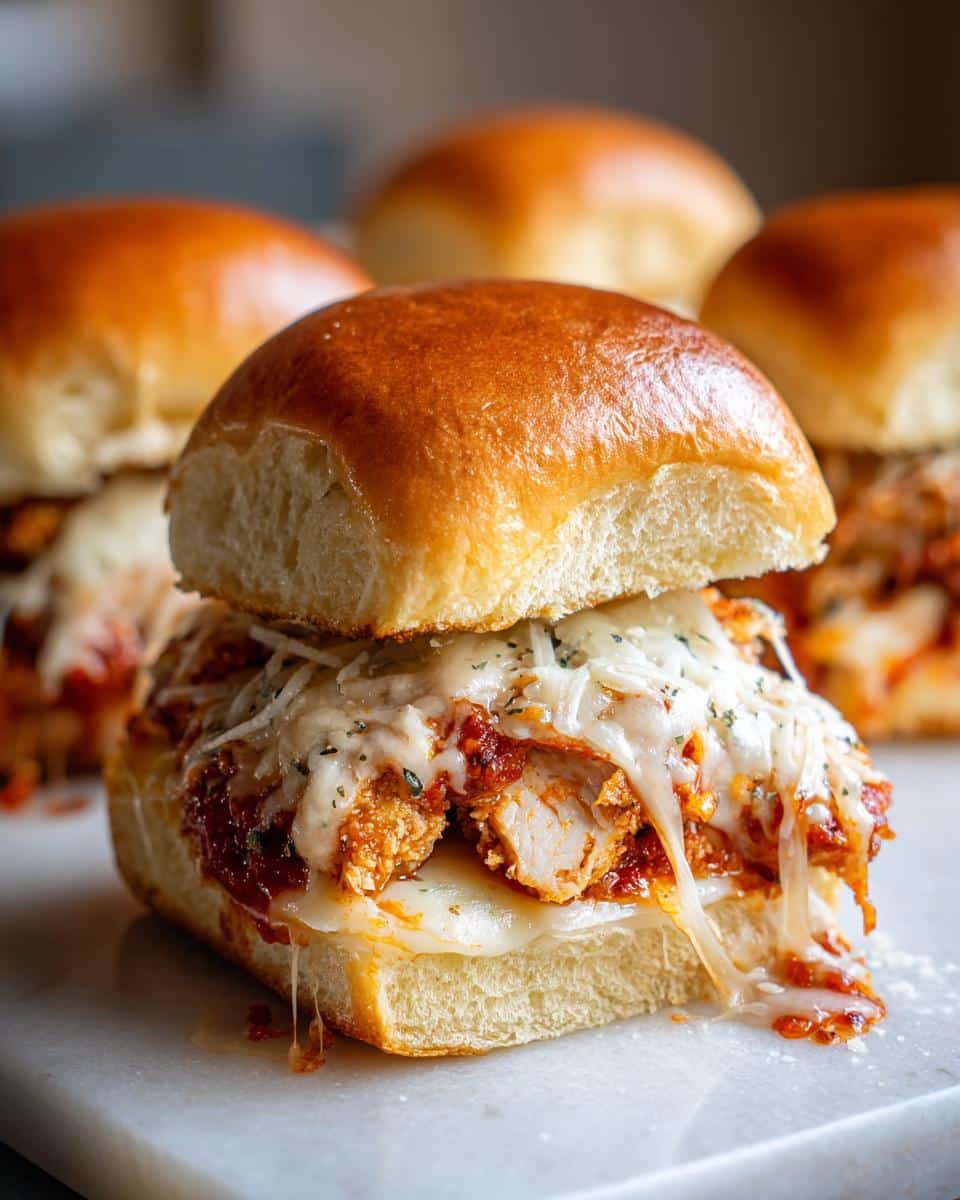
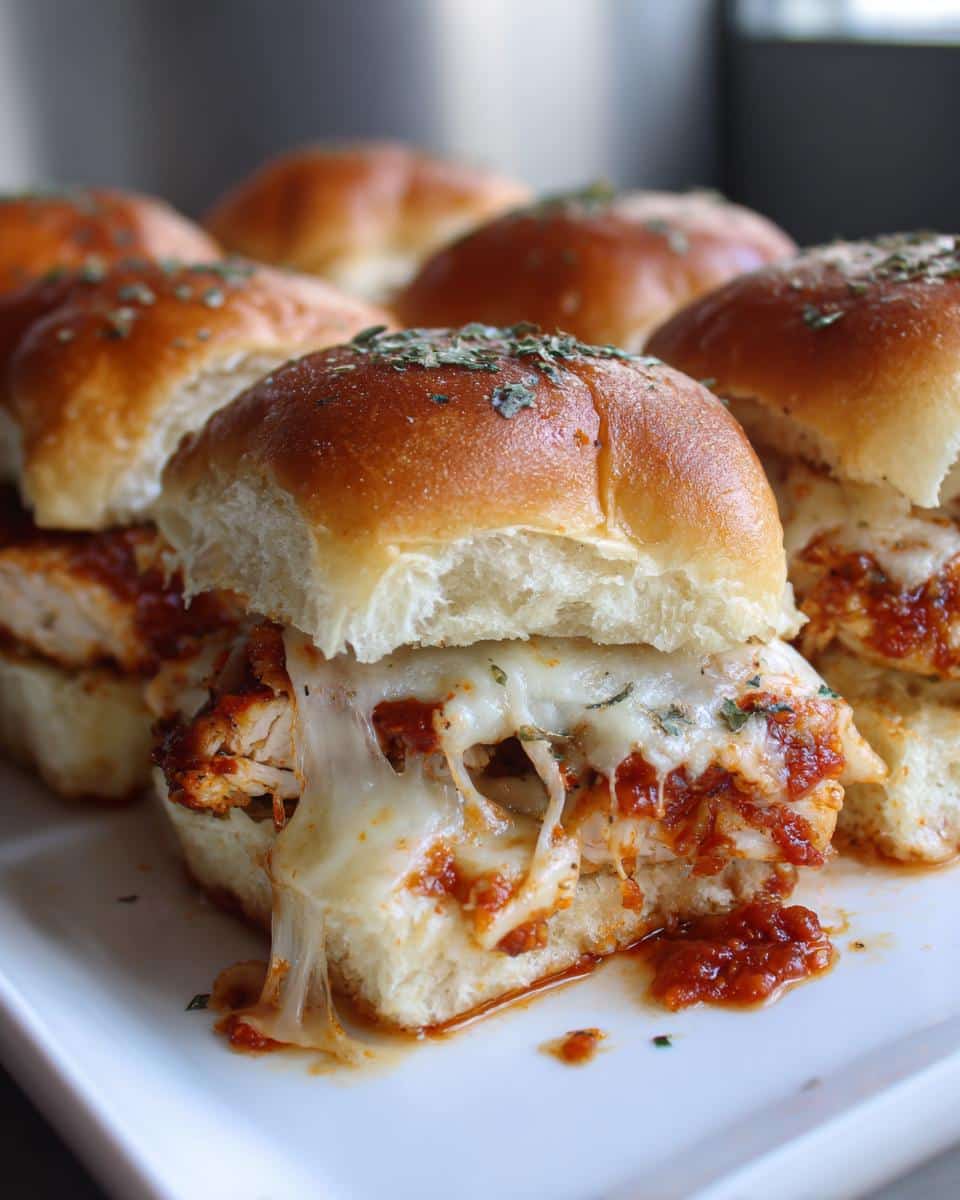
Irresistible 15-Minute Chicken Parmesan Sliders That Wow

Chicken Parmesan Sliders are easy-to-make party sandwiches perfect for game day or any gathering. They combine crispy chicken, melted cheese, and savory tomato sauce in a soft slider bun.
- Prep Time: 10 minutes
- Cook Time: 15 minutes
- Total Time: 25 minutes
- Yield: 12 sliders
- Category: Appetizer
- Method: Baking
- Cuisine: Italian-American
- Diet: Low Lactose
Ingredients
- 12 slider buns
- 1 lb cooked chicken breast, sliced
- 1 cup marinara sauce
- 1 cup shredded mozzarella cheese
- 1/4 cup grated Parmesan cheese
- 1/2 tsp garlic powder
- 1/2 tsp dried basil
- 2 tbsp butter, melted
Instructions
- Preheat oven to 350°F (175°C).
- Slice slider buns in half and place the bottom halves in a baking dish.
- Layer cooked chicken over the buns.
- Spread marinara sauce evenly over the chicken.
- Sprinkle mozzarella and Parmesan cheese on top.
- Place the top halves of the buns over the cheese.
- Brush melted butter over the tops and sprinkle with garlic powder and basil.
- Bake for 15 minutes or until cheese melts and buns are golden.
- Serve warm.
Notes
- Use pre-cooked chicken to save time.
- Add a sprinkle of red pepper flakes for extra heat.
- Let sliders cool slightly before serving to prevent burns.
The best part is how versatile they are. I’ve served these at everything from backyard BBQs to book club meetings, and they always disappear fast. When that first bite hits with all the flavors of classic chicken parm in perfect little sandwich form? Game over – you’ve got a new favorite party food. You can find more inspiration for party favorites on our Pinterest page.
Why You’ll Love These Chicken Parmesan Sliders
Trust me, once you try these sliders, they’ll become your secret weapon for every gathering. Here’s why:
- Crazy easy: You probably have most ingredients already, and pre-cooked chicken means no fuss
- Party magic: One tray feeds a crowd, and everyone can grab their own – no plates needed.
- Flavor explosion: That crispy chicken, melty cheese, and garlicky butter combo? Absolute perfection
- Time-saver: From fridge to table in 25 minutes flat (I’ve timed it during halftime panic)
- Kid-approved: My picky nephew calls them “pizza sandwiches” and inhales three at a time
Seriously, these sliders solve every “what should I bring?” dilemma. Game day? Covered. Potluck? Done. Late-night snack attack? You bet.
Chicken Parmesan Sliders Ingredients
Here’s everything you’ll need to make these irresistible sliders – and trust me, the ingredient list is so simple you might already have most of this in your fridge or pantry. The magic is in how these basic ingredients come together.
- 12 slider buns – I like Hawaiian rolls for their sweetness, but any soft dinner rolls work great
- 1 lb cooked chicken breast, sliced thin – rotisserie chicken is my weeknight hero here
- 1 cup marinara sauce – use your favorite jarred brand or homemade if you’re feeling fancy
- 1 cup shredded mozzarella cheese – shred it yourself for better melt, but pre-shredded works in a pinch
- 1/4 cup grated Parmesan cheese – the real stuff, not the powder in the green can.
- 1/2 tsp garlic powder – this gives that addictive garlic bread vibe
- 1/2 tsp dried basil – or fresh if you’ve got it growing on your windowsill
- 2 tbsp butter, melted – this golden drizzle makes the tops crisp up beautifully
See? Nothing complicated. I always double check I’ve got everything laid out before assembling – it makes the process go so smoothly. Oh, and if you’re feeling extra (like I often am), keep some extra Parmesan and fresh basil on hand for garnish when serving.
Equipment You’ll Need
Don’t worry – you won’t need any fancy gadgets for these sliders. Here’s what I grab from my kitchen:
- 9×13 inch baking dish – or any oven-safe pan that fits your slider buns snugly
- Pastry brush – for that buttery garlic topping (my silicone one’s seen more sliders than I can count)
- Sharp knife – to slice those buns in half without squishing them
- Small bowl – for mixing melted butter with garlic powder and basil
That’s seriously it. Now let’s get those sliders in the oven.
How to Make Chicken Parmesan Sliders
Okay, let’s get these beauties assembled. I promise it’s so simple you’ll be shocked how much flavor comes from such easy steps. Just follow my lead – I’ve made these enough times to know every trick for perfect sliders every time.
Step 1: Prep the Buns and Chicken
First, preheat that oven to 350°F (175°C) – this gives it time to get nice and toasty while we prep. Now grab your baking dish and those slider buns. Here’s my secret: keep them connected in one big sheet when you slice them horizontally – it makes assembly way easier. Use a serrated knife and gentle sawing motions so you don’t squish the soft bread.
Place the bottom halves snugly in your baking dish. Now layer on that chicken – I like to do slightly overlapping slices so every bite gets protein. Pro tip: if your chicken’s thick, give it a quick pound with a meat mallet first. Thin slices mean more surface area for all that cheesy goodness.
Step 2: Layer Sauce and Cheese
Time for the saucy magic. Spoon your marinara over the chicken, spreading it evenly with the back of the spoon. Don’t go crazy – about 1-2 tablespoons per slider is perfect. Too much sauce makes soggy buns (trust me, I learned this the messy way).
Now the cheesy blanket. Sprinkle that shredded mozzarella evenly across all the sliders. Watch for bare spots – I always do a little cheese-check dance around the pan. Then the Parmesan snowstorm. The fine grating means it melts into every nook. My Italian grandma would approve of this cheesy layering technique. If you want more ideas on using Parmesan, check out this recipe for garlic herb compound butter.
Step 3: Bake to Perfection
Pop the top bun halves on like little hats. Now for the finishing touch – mix melted butter with garlic powder and basil, then brush it generously over the tops. This gives that golden, crispy crust we all love. Slide them into the oven and set your timer for 15 minutes.
You’ll know they’re done when the cheese is bubbly and the bun tops turn that perfect golden brown. If your oven runs hot, peek at 12 minutes – nobody likes burnt slider tops. Let them cool just a minute (melty cheese burns are no joke) before separating with a sharp knife. Then watch them disappear.
Tips for the Best Chicken Parmesan Sliders
After making these sliders more times than I can count, I’ve picked up some foolproof tricks to make them absolutely perfect every time:
- Rotisserie chicken is your friend – Saves so much time, and the flavor is amazing. Just shred it while warm.
- Don’t drown them in sauce – Too much marinara makes soggy buns. I use about 1 tablespoon per slider.
- Let them rest – 2 minutes out of the oven lets the cheese set so it doesn’t slide right off when you bite in.
- Freshly grate your Parmesan – The pre-grated stuff doesn’t melt as nicely. Worth the extra 30 seconds.
- Watch the clock – Set a timer, Those buns go from golden to burnt surprisingly fast.
Follow these simple tips, and you’ll have sliders that disappear faster than you can say “seconds please” If you are looking for another quick chicken dish, try this easy 20-minute chicken piccata recipe.
Chicken Parmesan Sliders Variations
One of my favorite things about these sliders is how easily you can mix them up. Here are some delicious twists I’ve tried when I’m feeling adventurous:
- Spicy kick: Add red pepper flakes to the marinara or sprinkle some on top before baking
- Cheese swap: Try provolone or fontina instead of mozzarella for extra melty goodness
- Garlic lovers: Mix minced fresh garlic into the butter topping (trust me, it’s amazing)
- Pesto twist: Spread a thin layer of basil pesto under the marinara sauce
The possibilities are endless – make them your own. Just don’t tell my husband I messed with his “perfect” original version. For another great party appetizer, check out our recipe for mini quiches.
Serving and Storing Chicken Parmesan Sliders
Oh, the moment we’ve been waiting for – serving these gorgeous sliders. I always bring them to the table right in the baking dish (less dishes = winning) with extra napkins because things get deliciously messy. They’re best served warm when the cheese is still gloriously stretchy. If you’re fancy like my sister, garnish with fresh basil leaves for that “wow” factor.
Got leftovers? (Unlikely, but it happens) Store them in an airtight container in the fridge for up to 3 days. When reheating, I pop individual sliders in the toaster oven at 300°F for about 5 minutes – just enough to wake up that melty cheese without drying out the buns. Microwave works in a pinch, but you’ll lose that perfect crispness. Pro tip: If you’re making these ahead, assemble everything but wait to bake until right before serving – they’ll taste fresh out of the oven.
Chicken Parmesan Sliders FAQs
Here are answers to all the burning questions I’ve gotten about these irresistible sliders – everything from “Can I make them ahead?” to “Why did my cheese slide off?” (Been there) These are the real questions my friends and family ask every time I make them.
Can I use frozen chicken for these sliders?
Absolutely, I’ve done this many times when I’m in a pinch. Just thaw the chicken completely first and pat it dry with paper towels – excess moisture makes soggy buns (the horror). My trick? Bake or air fry the frozen chicken from the start – it keeps it from getting rubbery like microwaving sometimes does.
How long do leftovers last?
Honestly, in my house they never last more than a day. But properly stored in an airtight container, they’ll keep in the fridge for 2-3 days. The buns get a bit softer, but a quick toast revives them nicely. I don’t recommend freezing them though – the texture just isn’t the same when thawed.
Can I prepare these sliders ahead of time?
My favorite game day hack. You can assemble everything (sauce, cheese, the works) up to 8 hours ahead – just cover tightly and refrigerate. When it’s party time, brush with the garlic butter and bake as usual. You might need an extra 2-3 minutes since everything starts cold. Works like a charm.
Why did my cheese slide off when I bit into it?
Oh honey, we’ve all been there. The culprit is usually too much sauce making everything slippery. Next time, use just enough marinara to coat the chicken thinly. Also, let the sliders rest for 2 minutes after baking – this lets the cheese set slightly so it sticks better. My husband still teases me about the time I wore marinara like lipstick.
What’s the best way to serve these at a party?
After years of trial and error (and many messy napkins), here’s my foolproof method: Keep them in the baking dish with a stack of small plates nearby. Slice them completely before serving so guests can grab easily. I always make a little sign that says “Careful – cheesy goodness inside” because that first bite is always molten lava hot.
Nutritional Information
Now, I’m no nutritionist, but I do know that good food should make you happy – and these sliders definitely deliver on that front. Keep in mind that nutritional values can vary depending on the specific ingredients and brands you use. The cheese amounts, bun types, and even your marinara choice can all affect the final numbers.
That said, these Chicken Parmesan Sliders balance protein from the chicken, carbs from those pillowy buns, and just enough cheese to make life worth living. I always say everything in moderation – though good luck stopping at just one slider when they’re this delicious. If you’re looking for a healthy alternative, try this healthy chicken salad with grapes and walnuts.
Try this recipe and share your results in the comments. Did your family go crazy for them? Any fun variations you tried? I’d love to hear your slider stories. For more great recipes, follow us on Pinterest.


