Oh my goodness, do I have a brownie story for you. Picture this: me at age 10, standing on a wobbly kitchen chair, determined to make my first batch of brownies completely by myself. Flour everywhere, chocolate smudges on my cheeks – but when those rich, fudgy squares came out of the oven? Pure magic. That was the moment I fell in love with baking.
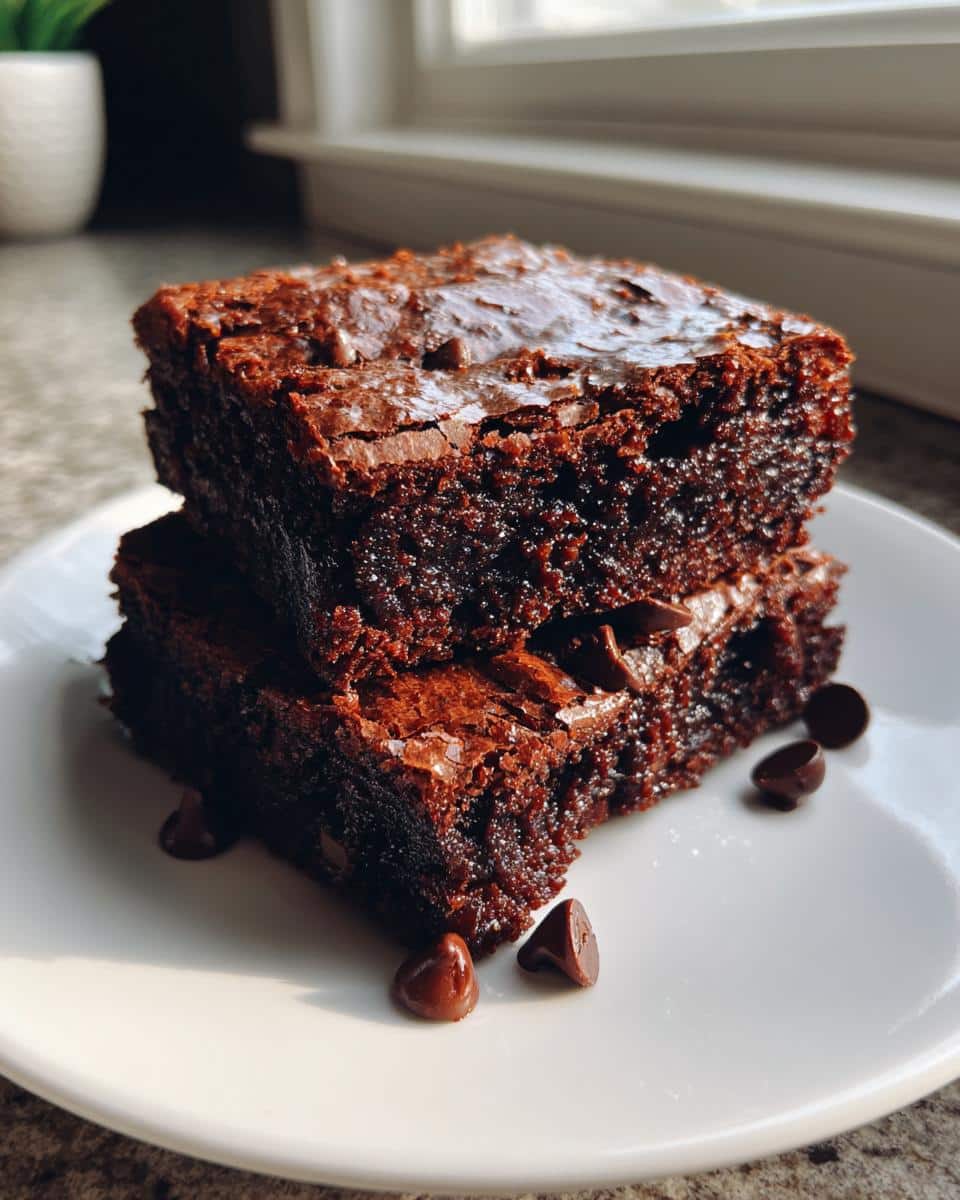
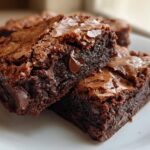
Now, after years of trial and error (and many, many batches), I’ve perfected what I truly believe are the best homemade brownies. We’re talking deep chocolate flavor with that perfect crackly top and a center so moist it practically melts in your mouth. These aren’t just any brownies – they’re the kind that disappear within minutes at family gatherings, with everyone sneaking “just one more” square.

Table of Contents
Ingredients for Perfect Brownies
Listen, I know some people just grab whatever’s in the pantry when they make brownies, but trust me – using the right ingredients makes ALL the difference. Here’s what you’ll need for brownies so good they’ll make you close your eyes and sigh after the first bite:
- 1 cup (225g) unsalted butter – Melted and slightly cooled. I always use real butter, never margarine. It gives that rich, velvety texture we all crave.
- 2 cups (400g) granulated sugar – Measure this precisely. Too much and your brownies will be sickly sweet, too little and they’ll lack that classic brownie taste.
- 4 large eggs – At room temperature, please. Cold eggs can make your batter seize up. I leave mine out about 30 minutes before baking.
- 1 tsp vanilla extract – The real stuff, not imitation. It enhances all that chocolatey goodness.
- 1 cup (120g) all-purpose flour – Spooned and leveled to avoid dense brownies. I learned this the hard way.
- 3/4 cup (75g) cocoa powder – Use good quality Dutch-process for deep flavor. Sift it to prevent lumps – your batter will thank you.
- 1/2 tsp salt – Just enough to balance the sweetness without tasting salty.
- 1/2 tsp baking powder – Our secret for that perfect lift without making them cakey.
- 1 cup (175g) chocolate chips (optional) – Because more chocolate is always better. I prefer semi-sweet for contrast.
How to Make the Best Brownies
Okay, here’s where the magic happens. Making perfect brownies is easier than you think – as long as you follow these steps carefully. I’ve burned enough batches in my life to know exactly what works (and what doesn’t). Let’s get baking.
Preparing the Batter
First things first – preheat that oven to 350°F (175°C). Trust me, starting with the right temperature is crucial. While it’s heating up, grab your favorite saucepan (I use my grandma’s old copper-bottomed one) and melt the butter over low heat. You want it just melted, not boiling – we’re making brownies, not frying butter.
Now here’s my favorite part: take the butter off the heat and stir in the sugar. The mixture will look grainy at first, but keep stirring until it becomes this gorgeous, glossy paste. This is when I add the eggs one at a time, beating well after each one. Don’t rush this step. The eggs need time to fully incorporate. Then splash in that vanilla – the smell alone is heavenly.
Next, sift together your dry ingredients. Yes, sifting matters. It prevents lumps and makes for the smoothest batter. Gently fold the dry mixture into the wet ingredients – I use a wooden spoon and make big, slow circles. When it’s almost combined, toss in those chocolate chips if you’re using them (and why wouldn’t you?). Fold just until no flour streaks remain – overmixing is the enemy of fudgy brownies.
Baking and Cooling
Pour that beautiful, chocolatey batter into your greased 9×13-inch pan. I like to use the middle oven rack for even baking. Set your timer for 25 minutes, but start checking at 23 – oven temperatures can vary wildly.
The toothpick test is your best friend here. Stick it in the center – you want moist crumbs clinging to it, not wet batter. If it comes out completely clean, you’ve gone too far. The brownies will keep cooking a bit as they cool, so err on the side of underbaking.
Now the hardest part: WAIT. I know, I know – the smell is intoxicating. But letting them cool completely (about 2 hours) gives you those perfect, clean cuts. If you cut too soon, you’ll have a gooey mess (delicious, but messy). For extra neat squares, chill them in the fridge for 30 minutes before slicing.
Tips for Fudgy Brownies
Alright, let me spill all my brownie secrets – these are the tricks I’ve learned after years of baking (and eating) way too many batches. Follow these tips, and you’ll get that perfect fudgy texture every single time.
Underbake just slightly
This is my golden rule, Brownies continue cooking as they cool, so take them out when the toothpick has moist crumbs – not wet batter, but definitely not clean. That extra minute or two makes all the difference between dry bricks and melt-in-your-mouth perfection. I always set my timer for 2-3 minutes less than the recipe suggests.
Use the best cocoa powder you can find
Not all cocoa powders are created equal. Splurge on Dutch-process cocoa – it’s richer and less acidic. My favorite trick? Taste a pinch straight from the container. If it makes your eyes roll back with chocolatey bliss, it’ll make amazing brownies. Cheap cocoa tastes flat and dusty by comparison.
Don’t overmix the batter
I know it’s tempting to keep stirring until everything looks perfectly smooth, but resist, Overmixing develops gluten, which turns fudgy brownies into cakey ones. Mix just until the flour disappears, then stop. A few small lumps are totally fine – they’ll melt away during baking.
Let them cool completely before cutting
I know this is torture when your kitchen smells like chocolate heaven, but trust me – patience pays off. Hot brownies are basically molten lava cakes (delicious, but messy). Letting them cool for at least 2 hours gives the structure time to set. For super clean cuts, chill them in the fridge first.
Line your pan with parchment paper
Greasing is good, but parchment paper is a game-changer. Leave some overhang on the sides, and you can lift the whole slab out for easy cutting. No more wrestling with stuck-on corners, Bonus: cleanup is a breeze – just toss the paper.
Brownie Variations
Now, while I adore my classic brownie recipe, sometimes I love shaking things up. Here are my favorite ways to jazz them up when I’m feeling fancy (or when my sweet tooth demands something extra special):
Nutty Brownies
My dad always begged me to add walnuts – and I finally caved one Christmas. Now it’s our tradition, Toast 1 cup of walnuts or pecans first (trust me, it makes ALL the difference), then fold them into the batter. The crunch against that fudgy center? Absolute perfection.
Peanut Butter Swirl
Ohhh this one’s dangerous. Mix 1/2 cup peanut butter with 2 tbsp powdered sugar, then dollop it over the batter. Swirl with a knife for that gorgeous marbled effect. The salty-sweet combo makes these disappear faster than you can say “just one more”
Sea Salt Topped
Simple but magical – right after baking, sprinkle flaky sea salt over the top while they’re still warm. The salt crystals melt slightly, creating these amazing little bursts of flavor that make the chocolate taste even richer. I use Maldon salt – those pretty pyramid flakes look and taste incredible.
Mint Chocolate
For St. Patrick’s Day last year, I added 1 tsp peppermint extract to the batter and folded in Andes mints. The result? A brownie that tastes like your favorite holiday candy, but way more sophisticated. Pro tip: serve these chilled with a glass of cold milk.
Storing and Freezing Brownies
Okay, confession time – I’ve never actually had brownies last long enough to need storing in my house, But for those rare occasions when you have leftovers (or if you’re smart and make a double batch), here’s how to keep them fresh and fudgy for days – or even months.
Room Temperature Storage
For short-term storage (because let’s be real, they won’t last long), just pop them in an airtight container at room temperature. I like to layer them with parchment paper between slices so they don’t stick together. They’ll stay perfect for about 3-4 days this way. Pro tip: toss in a slice of bread to keep them soft – the brownies will absorb the bread’s moisture.
Freezing Like a Pro
Freezing is my secret weapon when I want brownie goodness anytime. First, let them cool completely (hot brownies create condensation = freezer burn). Then wrap individual squares tightly in plastic wrap, followed by foil. Or if you’re freezing the whole batch, leave them in the pan, cover with plastic, then foil. They’ll keep beautifully for 2-3 months this way.
Thawing Without the Sog
When that brownie craving hits, don’t just toss frozen ones in the microwave (I learned this the hard way). Instead, unwrap and let them thaw at room temperature for about an hour. Want them warm? 10 seconds in the microwave max – any longer and you’ll have brownie pudding (which, okay, isn’t the worst thing ever). My favorite way? Eat them straight from the freezer – they’re like chocolate fudge popsicles.
Brownie FAQs
Can I use oil instead of butter?
Technically yes, but… (deep sigh) I really don’t recommend it. Butter gives brownies that rich, velvety texture and incredible flavor that oil just can’t match. That said, if you absolutely must substitute, use 3/4 cup vegetable oil instead of 1 cup butter. The texture will be denser and the flavor less complex, but they’ll still be edible. Just promise me you’ll try the butter version at least once.
How do I prevent dry brownies?
Oh honey, dry brownies are the saddest thing, My top three tips: 1) Underbake slightly (remember – moist crumbs on the toothpick), 2) Don’t overmix the batter, and 3) Store them properly in an airtight container. Also, make sure you’re measuring your flour correctly – too much flour is the #1 cause of dry brownies. Spoon it into the measuring cup, then level it off – no packing.
Why don’t my brownies have that shiny, crackly top?
Ah, the elusive crackly top, This comes from properly dissolving the sugar in the melted butter before adding other ingredients. Take your time with this step – stir the sugar into the warm butter until it looks glossy and slightly grainy. Also, make sure your eggs are at room temperature and beat them in really well. Cold eggs can ruin the magic.
Can I make these without eggs?
I’ve experimented with egg substitutes, and while flax eggs or applesauce can work in a pinch, the texture just isn’t the same. The brownies turn out more cakey and less fudgy. If you need an egg-free version, I’d recommend finding a recipe specifically designed that way rather than modifying this one. Some things just can’t be improved upon.
How do I get clean cuts without the brownies sticking?
Two words: chilled knife, After letting your brownies cool completely (I know, the wait is torture), pop them in the fridge for 30 minutes. Then use a sharp knife dipped in hot water and wiped dry between each cut. The cold firms up the brownies while the hot knife glides through cleanly. Works like a charm every time.
Nutritional Information
Just so you know, these numbers are estimates – my brownies are too delicious to be reduced to mere statistic, But for those keeping track, here’s the breakdown per brownie (based on 24 servings):
- Calories: 220
- Fat: 12g (7g saturated)
- Sugar: 20g
- Protein: 3g
Now forget these numbers and enjoy every chocolatey bite – life’s too short to count brownie calories.
Enjoy Your Brownies
Now comes the best part – diving into that tray of homemade brownies. I want to see your beautiful creations – tag me on Instagram when you make these so I can admire your handiwork. Did you add nuts? Swirl in peanut butter? Go classic? Every baker puts their own spin on them, and I love seeing all the variations.
Leave a comment below telling me how yours turned out. Was the fudge factor just right? Did your family fight over the last piece? (Mine always does) And if you loved this recipe as much as I do, please give it a five-star rating to help other chocolate lovers find it. Now go enjoy those brownies with a tall glass of cold milk – you’ve earned it

To discover more delicious recipes, click here .
Follow us in Facebook
PrintUltimate Fudgy Brownies Recipe with 4 Secret Tips
Classic homemade brownies with a rich, fudgy texture and deep chocolate flavor.
- Prep Time: 15 mins
- Cook Time: 30 mins
- Total Time: 45 mins
- Yield: 24 brownies
- Category: Dessert
- Method: Baking
- Cuisine: American
- Diet: Vegetarian
Ingredients
- 1 cup (225g) unsalted butter
- 2 cups (400g) granulated sugar
- 4 large eggs
- 1 tsp vanilla extract
- 1 cup (120g) all-purpose flour
- 3/4 cup (75g) cocoa powder
- 1/2 tsp salt
- 1/2 tsp baking powder
- 1 cup (175g) chocolate chips (optional)
Instructions
- Preheat oven to 350°F (175°C). Grease a 9×13-inch baking pan.
- Melt butter in a saucepan over low heat. Remove from heat and stir in sugar.
- Beat in eggs one at a time, then add vanilla.
- Sift together flour, cocoa powder, salt, and baking powder. Stir into batter.
- Fold in chocolate chips if using. Pour batter into prepared pan.
- Bake for 25-30 minutes until a toothpick comes out with moist crumbs.
- Cool completely before cutting into squares.
Notes
- For extra fudgy brownies, reduce baking time by 2-3 minutes.
- Store in an airtight container for up to 5 days.
- Freeze for longer storage – thaw before serving.


