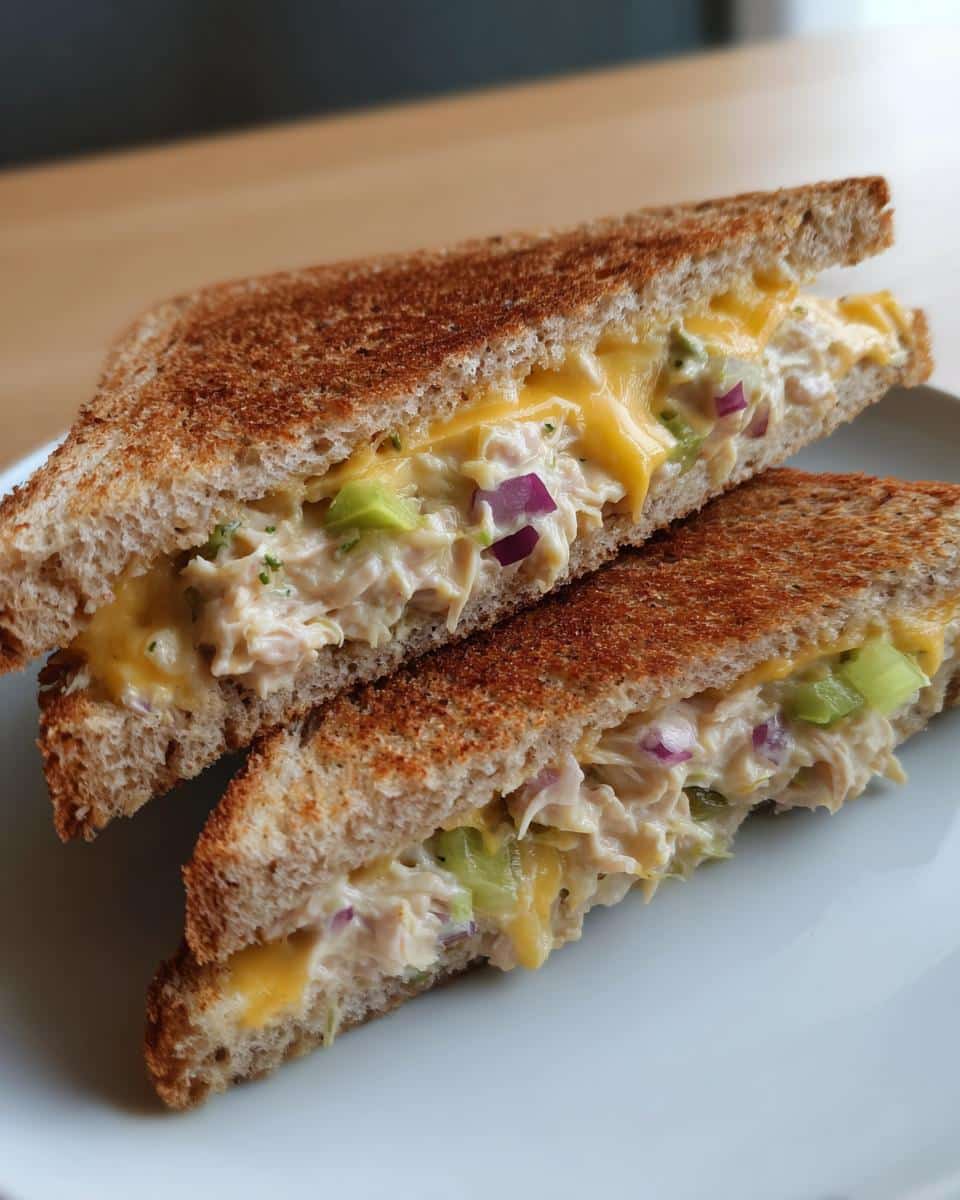
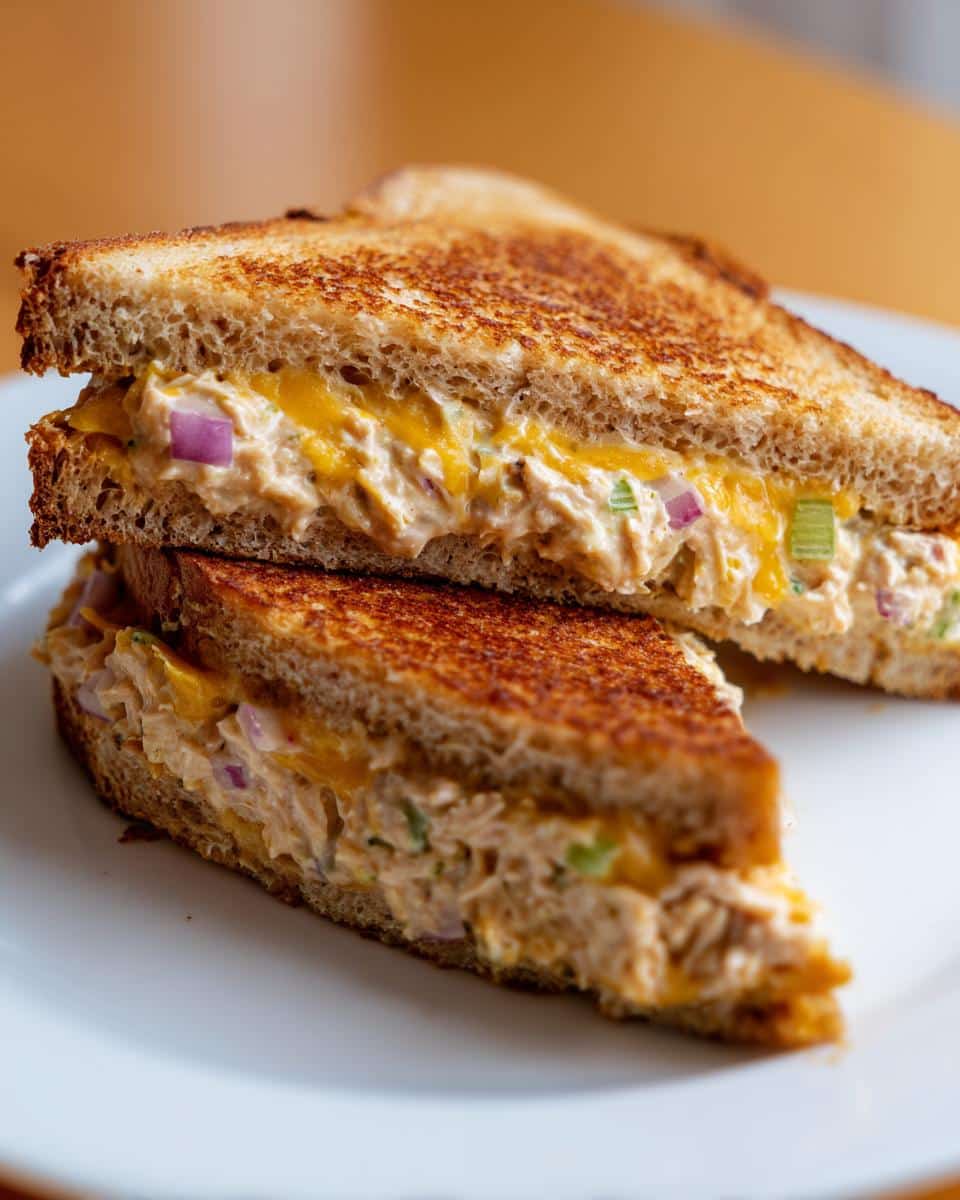
Let me tell you about my secret weapon for busy weeks – these high-protein tuna melt sandwiches . I used to dread lunchtime until I discovered this game-changer. Picture this: golden, crispy bread hugging a creamy tuna filling packed with 32 grams of protein, all ready to grab from your fridge. I’m obsessed with how quick they come together (just 16 minutes) and how they actually keep me full until dinner. No more sad desk salads or expensive takeout – just a warm, satisfying sandwich that tastes like I spent way more time than I actually did. Trust me, once you try these, you’ll be making them every Sunday like I do.
Table of Contents
32g Protein Tuna Melt Sandwiches – Your Meal Prep Savior

High-protein tuna melt sandwiches perfect for meal prep. A quick, healthy lunch option packed with flavor and nutrients.
- Prep Time: 10 mins
- Cook Time: 6 mins
- Total Time: 16 mins
- Yield: 2 sandwiches
- Category: Lunch
- Method: Pan-frying
- Cuisine: American
- Diet: Low Calorie
Ingredients
- 2 cans (5 oz) tuna in water, drained
- 1/4 cup Greek yogurt
- 1 tbsp Dijon mustard
- 1/4 cup diced celery
- 2 tbsp diced red onion
- 1/4 tsp garlic powder
- 4 slices whole wheat bread
- 1/2 cup shredded cheddar cheese
- 1 tsp olive oil
Instructions
- Mix tuna, Greek yogurt, mustard, celery, red onion, and garlic powder in a bowl.
- Spread tuna mixture evenly on two bread slices.
- Sprinkle cheddar cheese on top.
- Top with remaining bread slices.
- Heat olive oil in a pan over medium heat.
- Cook sandwiches for 3 minutes per side until golden brown.
Notes
- Store in airtight containers for up to 3 days.
- Reheat in toaster oven for best texture.
- Add sliced tomato or avocado for extra flavor.
Why You’ll Love These High-Protein Tuna Melt Sandwiches
Oh my goodness, where do I even start? These sandwiches have saved my lunch game more times than I can count. Here’s why they’re absolute magic:
- Protein powerhouse: That 32g of protein per sandwich keeps me full for hours – no 3pm snack attacks.
- Weekday lifesaver: Takes just 16 minutes start to finish (yes, I’ve timed it)
- Meal prep dream: They stay delicious in the fridge for days – the cheese gets all melty again when reheated
- Flavor bomb: The Greek yogurt-Dijon combo makes it tangy and creamy without being heavy
- Healthier twist: Swapping mayo for Greek yogurt means all the creaminess with way less guilt
Seriously, these sandwiches check all the boxes – quick, satisfying, and packed with good stuff. My coworkers are always eyeing my lunch with envy. cottage cheese meal ideas.
Ingredients for High-Protein Tuna Melt Sandwiches
Okay, let’s gather our sandwich superheroes. Here’s exactly what you’ll need (and yes, I’m picky about these specifics – it makes all the difference):
- 2 cans (5 oz) tuna in water, drained – squeeze out every last drop of water or your mix gets soggy
- 1/4 cup Greek yogurt – I use full-fat for extra creaminess, but any works
- 1 tbsp Dijon mustard – this little kick is what makes people ask “What’s in this?”
- 1/4 cup diced celery – tiny pieces, Nobody wants a giant celery chunk
- 2 tbsp diced red onion – soak in cold water for 5 minutes if you want milder flavor
- 1/4 tsp garlic powder – trust me, fresh garlic overwhelms here
- 4 slices whole wheat bread – the sturdier the better for holding all that goodness
- 1/2 cup shredded cheddar cheese – shred it yourself for maximum meltiness
- 1 tsp olive oil – just enough for that perfect golden crisp
See? Nothing fancy – just simple ingredients that work magic together. Now let’s make some sandwiches.
Equipment You’ll Need
Don’t worry – you won’t need any fancy gadgets for these sandwiches. Here’s my go-to setup (probably already in your kitchen):
- A medium mixing bowl – for that perfect tuna mixture
- Nonstick skillet – my trusty 10-inch works like a charm
- Spatula – nothing fancy, just something sturdy for flipping
- Knife & cutting board – for prepping those crunchy veggies
That’s it, No special tools required – just basic kitchen essentials to create sandwich magic.
How to Make High-Protein Tuna Melt Sandwiches
Alright, let’s get cooking. I’ve made these tuna melts probably a hundred times now, and I’ve nailed down the perfect method. Follow these steps and you’ll have the most delicious, protein-packed sandwiches ready before you know it.
Step 1: Prepare the Tuna Mixture
First things first – grab that mixing bowl and let’s make magic happen. Dump in your drained tuna (seriously, squeeze out every last drop of water or you’ll regret it). Add the Greek yogurt, Dijon mustard, celery, red onion, and garlic powder. Now here’s my secret – mash and stir until it’s totally combined but still has some texture. You want it creamy but not paste-like. Oh, and taste it. Need more mustard? Go for it. This is your sandwich, after all.
Step 2: Assemble the Sandwiches
Time to build our masterpiece. Lay out your bread slices and divide the tuna mixture evenly between two slices. Spread it right to the edges – no sad, bare corners allowed here. Now the best part – pile on that shredded cheese. Don’t be shy, cover every inch of tuna. Top with the remaining bread slices and give them a gentle press to seal the deal.
Step 3: Cook to Perfection
Heat your skillet over medium heat and add that teaspoon of olive oil. Carefully add your sandwiches – you should hear a happy little sizzle when they hit the pan. Cook for about 3 minutes until that beautiful golden brown crust forms. Flip them like you mean it (no wimpy flips) and cook another 3 minutes until the other side matches. The cheese should be gloriously melted and the tuna heated through. That’s it – lunch is served (or ready for meal prep).
Tips for the Best High-Protein Tuna Melt Sandwiches
After making these sandwiches more times than I can count, I’ve picked up some tricks that take them from good to “Oh my gosh, what is this magic?” Here are my can’t-live-without tips:
- Toast your bread first – Just a quick toast keeps it from getting soggy in the fridge – game changer.
- Shred your own cheese – those pre-shredded bags have anti-caking agents that ruin the melt factor.
- Let the tuna mix chill for 10 minutes before assembling – the flavors marry beautifully.
- Press gently while cooking with your spatula – helps that cheese get extra melty.
- Cool completely before storing – no one wants a steamy, soggy sandwich tomorrow.
Trust me, these little tweaks make all the difference between an okay sandwich and one you’ll crave all week. If you want more meal prep inspiration, check out my make ahead quinoa salad jars recipe.
Storage and Reheating Instructions
Okay, here’s the deal – these sandwiches stay amazing for days if you store them right. I always wrap each one tightly in foil or pop them in airtight containers (no plastic bags – they get soggy). They’ll keep perfectly for 3 days in the fridge.
When you’re ready to eat, skip the microwave – trust me on this. Instead, unwrap and toast in a 350°F oven or toaster oven for about 8 minutes until the cheese gets melty again and the bread crisps back up. If you’re at work? No worries – just pop it in the office toaster oven for 5 minutes. The smell alone will make your coworkers jealous.
Variations for High-Protein Tuna Melt Sandwiches
One of my favorite things about this recipe is how easily you can switch it up. Here are some delicious twists I’ve tried (and loved):
- Avocado addition: Slice some avocado on top before closing the sandwich – the creaminess is unreal.
- Cheese swap: Try pepper jack for some heat or Swiss for a nutty flavor – both melt beautifully.
- Bread alternatives: Sourdough gives amazing texture, or go low-carb with whole grain wraps.
- Extra crunch: Throw in some chopped pickles or bell peppers for a fresh bite.
- Protein boost: Mix in a hard-boiled egg or swap half the tuna for mashed chickpeas.
The possibilities are endless – make it your own and have fun with it. That’s the beauty of meal prep – keeping things interesting all week long. For other quick lunch ideas, check out this healthy chicken salad with grapes and walnuts.
Nutritional Information
Just so you know, these numbers are estimates – your exact counts might vary slightly depending on your ingredients. But here’s the scoop on why these sandwiches are such nutrition rockstars:
- 380 calories per sandwich – filling but not heavy
- 32g protein – hello, muscle fuel
- 6g fiber from that whole wheat bread
- Only 5g sugar – no crazy spikes here
Not too shabby for something that tastes this indulgent, right? The Greek yogurt swap keeps the fat reasonable while still delivering that creamy texture we all crave.
Frequently Asked Questions
I get asked about these tuna melt meal prep sandwiches ALL the time – here are the most common questions with my tried-and-true answers:
Can I use canned salmon instead of tuna?
Absolutely, Salmon works beautifully – just make sure to remove any bones and skin first. The flavor’s richer, so you might want to add an extra squeeze of lemon.
How long do these sandwiches actually last in the fridge?
They stay perfect for 3 days in airtight containers. After that, the bread starts getting sad. Pro tip: If you’re prepping for Friday, assemble Thursday night.
Can I freeze these tuna melts?
Honestly? I don’t recommend it. The texture gets weird when thawed. Stick to fridge storage for best results.
What’s the best way to reheat them?
Toaster oven is king, 350°F for 8 minutes brings back that crispy exterior and melty cheese. Microwave works in a pinch, but expect soggier bread.
Any dairy-free substitutions?
Try mashed avocado instead of Greek yogurt, and use your favorite vegan cheese. The flavor changes, but it’s still delicious.
Share Your High-Protein Tuna Melt Meal Prep Sandwiches
I’d LOVE to see your creations. Tag me @TunaMeltQueen (okay fine, that’s not my real handle – but you get the idea) or leave a comment below with your favorite twist. Did you add avocado? Try a different cheese? Spill all your sandwich secrets – I’m always looking for new ideas to try. You can also find more great meal ideas on our Pinterest page.


