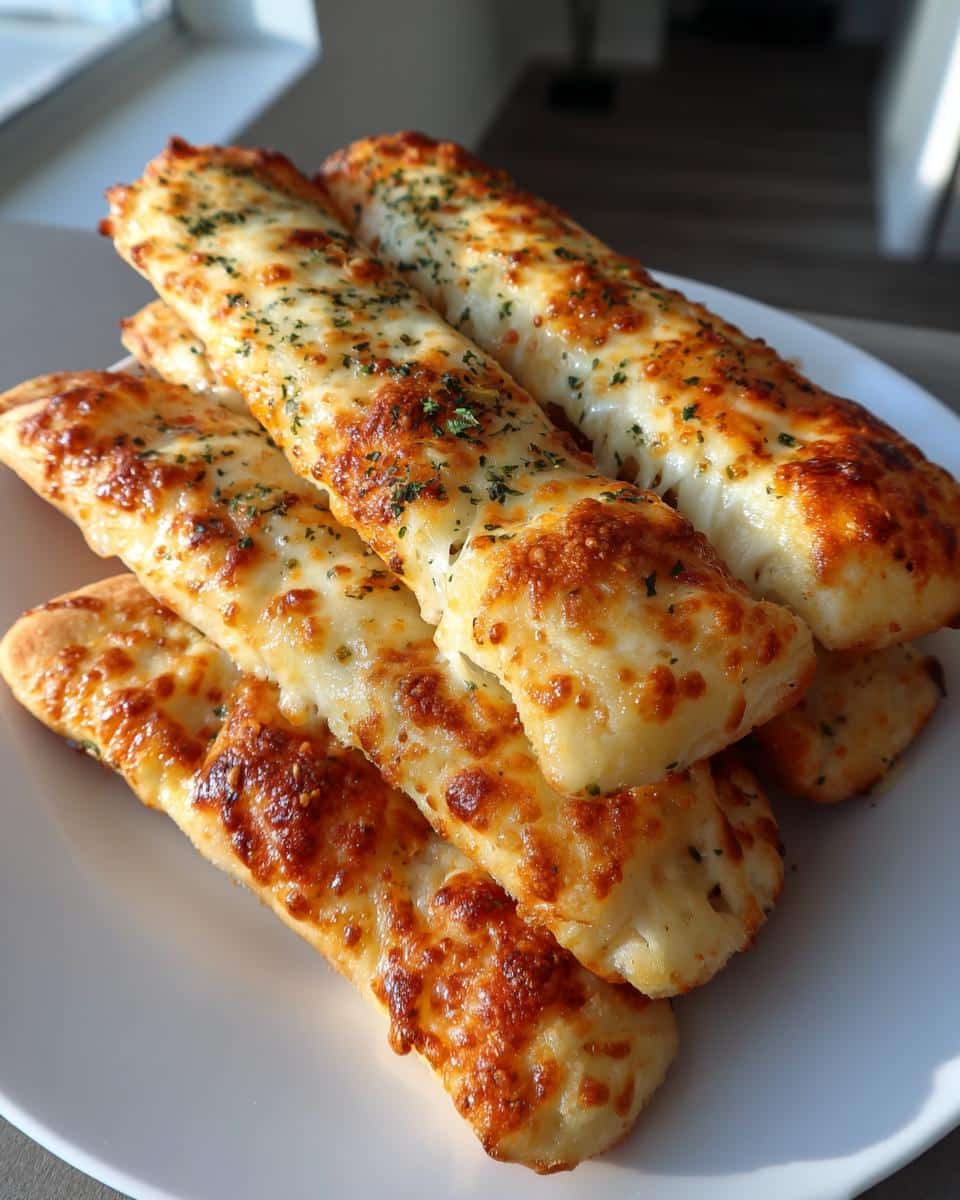
Oh my gosh, let me tell you about my absolute weakness – homemade cheesy garlic breadsticks. There’s something magical about pulling apart those golden, buttery strips loaded with bubbly cheese and that amazing garlic aroma. I first made these for a last-minute movie night with friends years ago, and now they’re my go-to “wow” dish that takes barely any effort. Honestly, I’ve probably made these cheesy garlic breadsticks over a hundred times – they’re that perfect combination of crispy edges, soft centers, and all that melty goodness. Whether you need a quick appetizer or the ultimate side dish for pasta night, this recipe never lets me down.
Table of Contents
25-Minute Homemade Cheesy Garlic Breadsticks You’ll Crave

Make delicious homemade cheesy garlic breadsticks with this easy recipe. Perfect as an appetizer or side dish.
- Prep Time: 10 mins
- Cook Time: 15 mins
- Total Time: 25 mins
- Yield: 8 breadsticks
- Category: Appetizer
- Method: Baking
- Cuisine: Italian
- Diet: Vegetarian
Ingredients
- 1 cup all-purpose flour
- 1 tsp baking powder
- 1/2 tsp salt
- 1/2 cup milk
- 2 tbsp butter, melted
- 2 cloves garlic, minced
- 1/2 cup shredded mozzarella cheese
- 1 tbsp grated Parmesan cheese
- 1/2 tsp dried oregano
Instructions
- Preheat oven to 375°F (190°C).
- Mix flour, baking powder, and salt in a bowl.
- Add milk and stir until dough forms.
- Knead dough lightly on floured surface.
- Roll dough into rectangle shape.
- Brush with melted butter and sprinkle minced garlic.
- Top with mozzarella and Parmesan cheese.
- Sprinkle oregano over cheese.
- Bake for 12-15 minutes until golden brown.
- Cut into strips and serve warm.
Notes
- Use fresh garlic for best flavor.
- Add more cheese if desired.
- Serve with marinara sauce for dipping.
Ingredients for Homemade Cheesy Garlic Breadsticks
Okay, let’s gather our simple but mighty ingredients – trust me, these basic pantry staples transform into something extraordinary. You’ll need 1 cup all-purpose flour (I always fluff mine first), 1 teaspoon baking powder (make sure it’s fresh), and 1/2 teaspoon salt to start our dough. For the wet ingredients, grab 1/2 cup milk (any kind works, but whole milk makes it extra rich). Now the fun part: 2 tablespoons melted butter (I microwave mine in 10-second bursts to avoid burning), 2 cloves fresh garlic, minced (please, please don’t use jarred – it makes all the difference), 1/2 cup shredded mozzarella (pack it lightly in your measuring cup), 1 tablespoon grated Parmesan, and 1/2 teaspoon dried oregano for that classic Italian flavor. That’s it. See? Nothing fancy, just real ingredients that sing together.
How to Make Homemade Cheesy Garlic Breadsticks
Alright, let’s get these beauties in the oven. I promise it’s easier than you think. First, crank up your oven to 375°F (190°C) – this gives us that perfect golden crunch. While that’s heating, grab a big bowl and whisk together the flour, baking powder, and salt. Now pour in the milk and stir until a shaggy dough forms – don’t worry if it looks rough at first.
Flour your hands and a clean surface, then knead the dough just 4-5 times until it comes together. Here’s my trick: if it sticks to your fingers, add a pinch more flour, but be gentle – we want tender breadsticks, not hockey pucks. Roll it into a rectangle about 1/4-inch thick (no ruler needed, just eyeball it). Now comes the fun part – brush that melted butter all over, sprinkle on your fresh minced garlic (trust me, the smell alone is worth it), then shower with mozzarella and Parmesan. A quick sprinkle of oregano adds that authentic pizzeria touch.
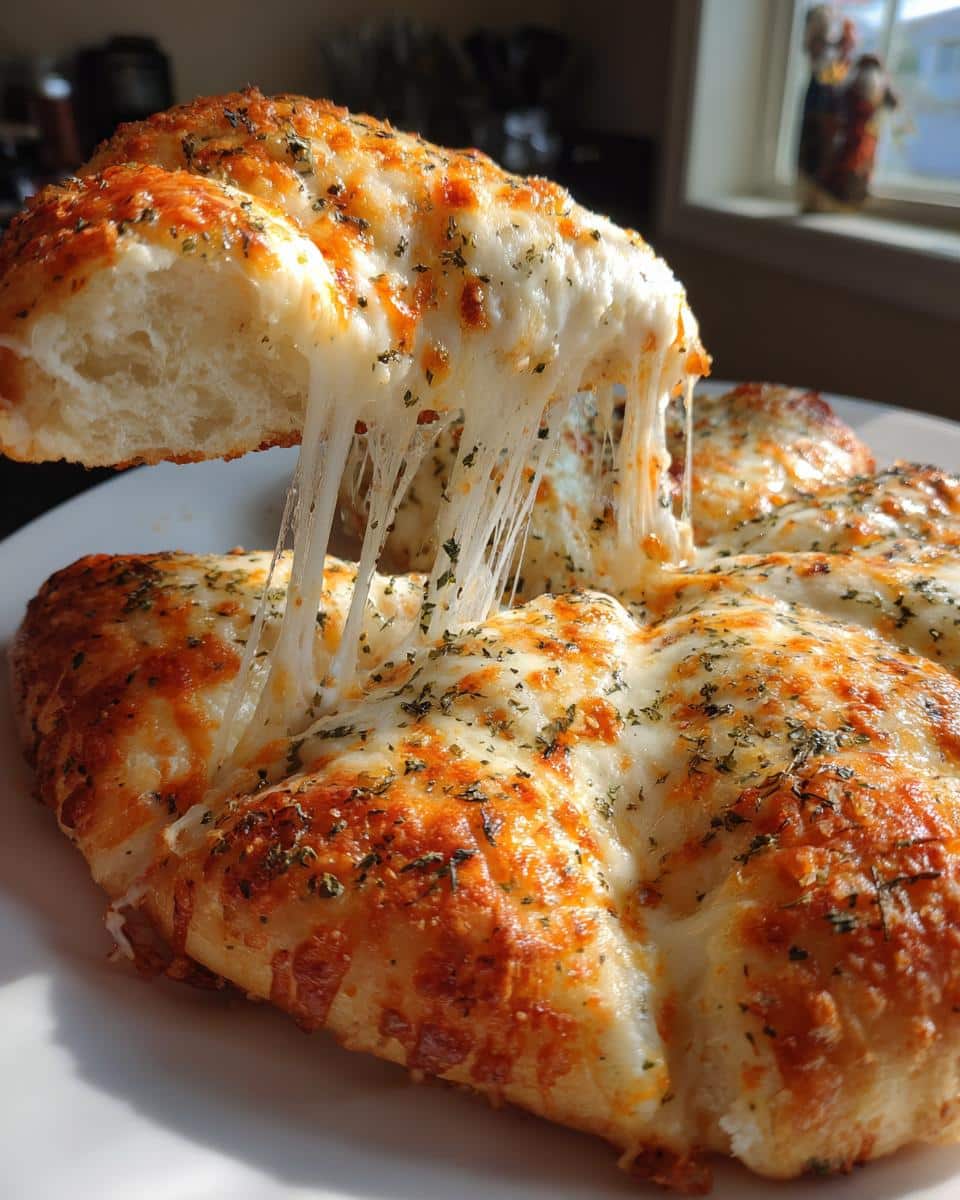
Pop it in the oven for 12-15 minutes until the cheese is bubbly and the edges turn golden brown. The hardest part? Waiting those agonizing 2 minutes before slicing into strips. Use a pizza cutter or sharp knife – I make mine about 1-inch wide for perfect dipping size. Serve immediately and watch them disappear.
Pro Tips for Perfect Breadsticks
- Garlic hack: Rub your cutting board with a cut garlic clove before mincing for extra flavor
- Sticky situation? Let the dough rest 5 minutes – it’ll be easier to handle
- Cheese lover? Double the mozzarella for epic stretchy pulls
- Crispy bottoms: Bake on the middle rack to prevent burning
Why You’ll Love These Homemade Cheesy Garlic Breadsticks
- Ready in 25 minutes flat – faster than waiting for delivery.
- Crazy customizable – add red pepper flakes, fresh herbs, or even bacon bits
- Always a crowd-pleaser – disappears faster than I can make them at parties
- Perfect pairing with marinara, ranch, or your favorite dipping sauce
- Easy appetizer or side dish that makes weeknights feel special
Ingredient Substitutions and Variations
Listen, I make these cheesy garlic breadsticks almost weekly, so I’ve tried every variation imaginable. For gluten-free folks, swap in 1-to-1 gluten-free flour – they’ll be slightly denser but still delicious. Vegan? Use plant-based butter and your favorite melty vegan cheese (Violife works great). Out of fresh garlic? 1/4 teaspoon garlic powder works in a pinch, but the flavor won’t be as bright. Want to jazz them up? Try these:
- Spicy twist: Add 1/4 teaspoon red pepper flakes with the garlic
- Herb garden: Mix 1 tablespoon chopped fresh basil into the dough
- Everything flavor: Sprinkle everything bagel seasoning over the cheese
- Extra fancy: Top with prosciutto after baking – the saltiness is amazing
Serving Suggestions for Homemade Cheesy Garlic Breadsticks
These breadsticks steal the show no matter how you serve them. My favorite way? Dipping them in warm marinara sauce – it’s like having a pizza party in every bite. They’re perfect alongside a big bowl of minestrone or Caesar salad for an easy weeknight dinner. Game nights aren’t complete without them, and I always make a double batch for parties because they vanish instantly. Honestly, they disappear so fast I sometimes have to hide a few for myself. If you want more great appetizer ideas, check out our mini quiches recipe.
Storing and Reheating Homemade Cheesy Garlic Breadsticks
Okay, confession time – these rarely last long enough to store at my house. But when they do (miracle of miracles), here’s how to keep them tasty. Pop them in an airtight container at room temperature for up to 2 days. Want that fresh-from-the-oven magic? Reheat in a 350°F oven for 5 minutes or toast them lightly – that brings back the crispiness. Whatever you do, don’t microwave unless you enjoy sad, soggy breadsticks (learned that the hard way). For more delicious recipes, follow us on Pinterest.
Homemade Cheesy Garlic Breadsticks FAQs
Can I use pre-minced garlic from a jar?
You can, but fresh garlic makes all the difference. Jarred garlic lacks that bright, punchy flavor we love in these breadsticks. If you must use it, go for 1 teaspoon instead of fresh cloves – it’s more concentrated.
How do I prevent soggy breadsticks?
Three tricks: 1) Don’t overdo the butter – a light brush is enough. 2) Bake on the middle rack for even heat. 3) Let them cool 2 minutes before slicing – this lets the cheese set so it doesn’t make the dough wet.
Can I make the dough ahead?
Absolutely, Mix the dry ingredients the night before, then just add milk when ready. The shaped dough (before toppings) can chill covered for 2 hours – just add 1-2 minutes to baking time. If you are looking for other quick sides, try our crispy smashed potatoes.
Why aren’t my breadsticks fluffy?
Over-kneading is usually the culprit – stop as soon as the dough comes together. Also check your baking powder isn’t expired. Fresh leavener gives that perfect lift.
What’s the best cheese blend?
I swear by the mozzarella-Parm combo, but try adding a pinch of smoked Gouda or sharp cheddar for extra flavor. Just keep the total cheese at about 3/4 cup max or they’ll get heavy. For another cheesy side, check out our recipe for spinach artichoke dip.
Nutritional Information
Just a quick note – these nutritional values are estimates and may change depending on the exact ingredients and amounts you use.
Go ahead – try this recipe tonight and tell me how your cheesy garlic breadsticks turned out in the comments below.


