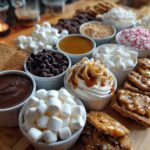
There’s nothing quite like gathering friends and family around a steaming mug of hot chocolate during the holidays—but why stop there? My hot chocolate charcuterie board takes cozy to a whole new level, turning your winter gatherings into something truly magical. I first threw one together last Christmas Eve when unexpected guests dropped by, and now it’s become our must-have tradition. Picture this: three kinds of melted chocolate, towers of marshmallows, crushed peppermint that glistens like snow, and all those little cookies just begging to be dunked. The best part? Everyone gets to create their dream cup of cocoa exactly how they like it. Whether it’s a snowy movie night or your holiday party centerpiece, this edible masterpiece brings the warmth and cheer we all crave this time of year.
Table of Contents
Why You’ll Love This Hot Chocolate Charcuterie Board
Trust me, this isn’t just another dessert—it’s an experience. Here’s why this hot chocolate board will steal the show:
- Effortless entertaining: No baking, no fuss—just dump, arrange, and watch the magic happen
- Total customization: From peppermint purists to caramel fanatics, everyone builds their perfect mug
- Instant holiday vibes: The sparkling sprinkles and chocolate waterfalls look straight out of a Christmas movie
- Kid-approved magic: Little hands love dunking cookies and swirling their own creations
- Better than basic cocoa: Why serve plain drinks when you can turn them into edible art?
Ingredients for Your Hot Chocolate Charcuterie Board
Here’s the secret – your board is only as good as what you put on it. After years of holiday trial and error (and many sticky fingers), I’ve nailed the perfect mix. You’ll want three kinds of chocolate, because variety is the spice of life – or in this case, the sweetness of winter.
The Chocolate Trio (Your Flavor Foundation)
- 8 oz dark chocolate chips (my secret? Ghirardelli 60% cacao)
- 8 oz milk chocolate chips (for the classic cocoa lovers)
- 8 oz white chocolate chips (makes everything feel extra festive)
Toppings That Steal the Show
- 1 cup mini marshmallows (the tiny ones melt so perfectly)
- 1/2 cup crushed peppermint (use candy canes for holiday crunch)
- 1/2 cup caramel sauce (warmed slightly so it drizzles beautifully)
- 1/2 cup chocolate syrup (because more chocolate is always better)
- 1/2 cup sprinkles (I use the holiday-shaped ones – so cheerful)
- 1 cup whipped cream (the fluffy cloud every cocoa needs)
Dippers for Days
- 1 cup cookies (shortbread stars and gingerbread men are my go-to)
- 1 cup biscotti (perfect for sturdy dunking without the sogginess)
Pro tip: Have extra warm milk ready – about 4 cups should do for 8 people. Whole milk makes it extra creamy, but almond milk works great too.
Equipment Needed
Grab these essentials – most are probably already in your kitchen. You’ll need:
- A large wooden board or platter (the bigger, the better for all those toppings)
- Small ramekins or bowls (I use mismatched holiday mugs for extra charm)
- Lots of spoons (one for each topping prevents delicious cross-contamination)
- A milk warmer or small saucepan (because lukewarm cocoa is a crime)
Bonus points for festive napkins – you’ll need them after all that chocolatey fun.
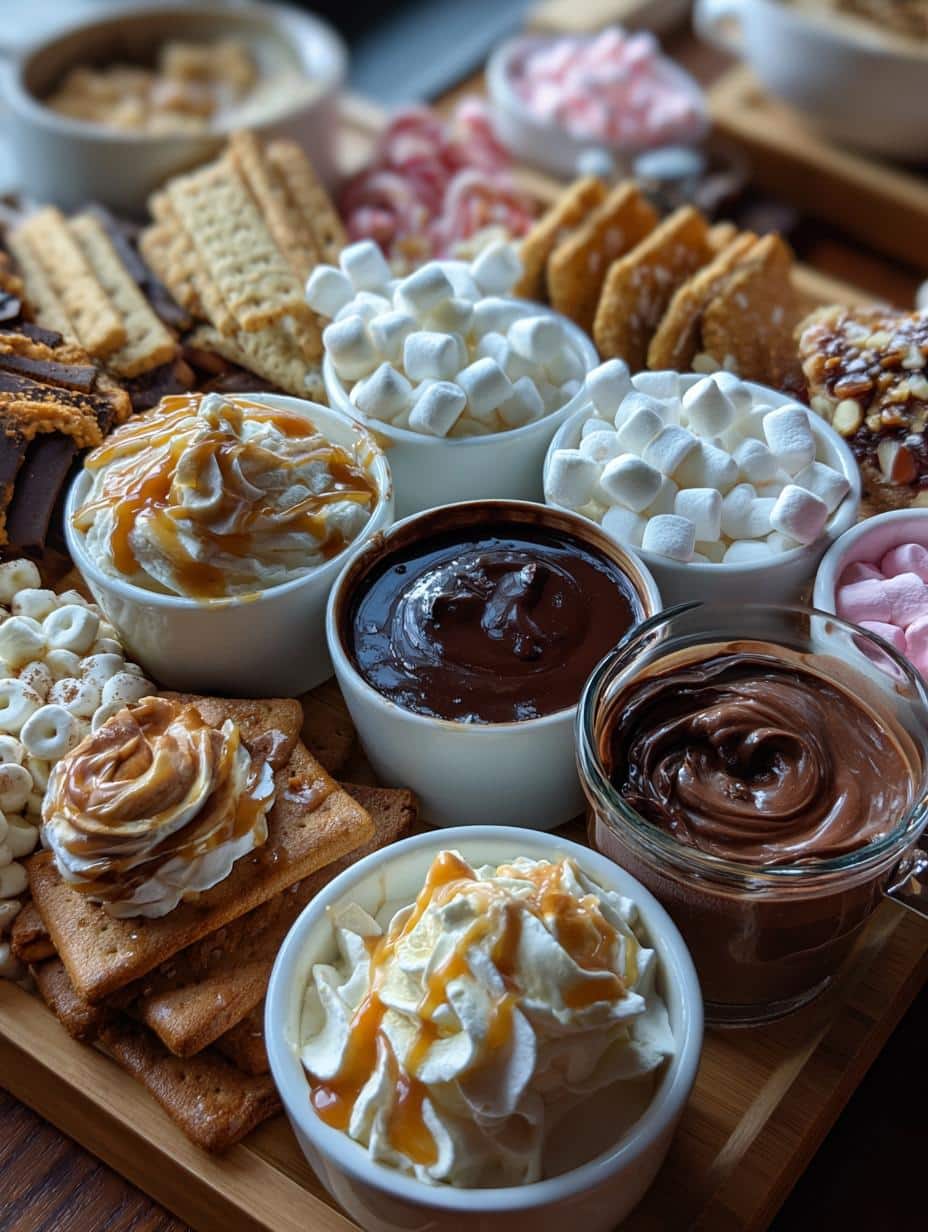
How to Assemble a Hot Chocolate Charcuterie Board
Okay, here’s where the real fun begins. Assembling this board is like creating your own winter wonderland – but tastier. I always put on some holiday tunes and pour myself a little eggnog while I work (chef’s perks). Follow these steps and you’ll have guests ooh-ing and aah-ing in no time.
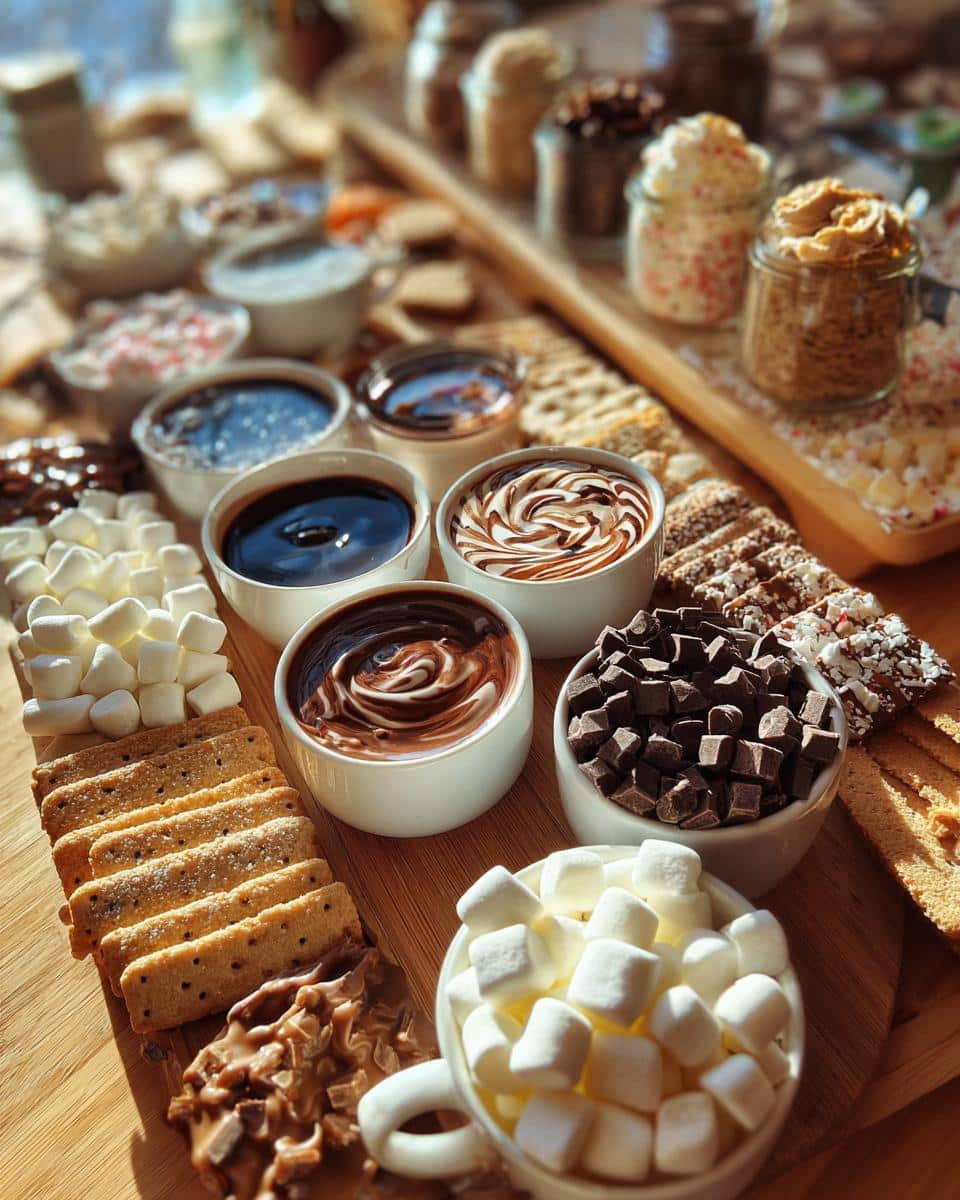
Step 1: Arrange Chocolate Bases
First things first – those glorious melted chocolates. I place three small heatproof bowls (ceramic works best) in a triangle pattern on the board. Microwave each chocolate type separately in 30-second bursts, stirring between each until silky smooth. Dark chocolate goes front left, milk front right, white in the back – creates a perfect color gradient. Keep them warm with tea lights underneath if you’ve got them.
Step 2: Add Toppings and Dippers
Now for the artistic part. Scatter the marshmallows in fluffy piles near the chocolates. Place toppings in small bowls around the board – I do peppermint next to dark chocolate (perfect pairing), caramel by the milk chocolate, and sprinkles near the white. Cookies and biscotti get arranged standing up along the edges – makes them easy to grab. Leave some empty space so guests can set their mugs down while they create.
Step 3: Serve with Warm Milk
Here’s the golden rule: milk should be hot but not boiling (about 160°F). I keep mine in a thermal carafe so it stays perfect all night. Place it at the board’s center with a ladle – this becomes everyone’s starting point. Now watch the magic happen as guests swirl, dunk, and customize to their heart’s content.
Tips for the Perfect Hot Chocolate Charcuterie Board
After setting up more boards than I can count, I’ve learned a few tricks that make all the difference. First, warm your serving bowls beforehand – a quick dip in hot water prevents chocolate from seizing up too fast. Keep toppings fresh by adding marshmallows and whipped cream last minute (nobody likes soggy ‘mallows). My secret weapon? Seasonal sprinkles – swap ghosts for snowflakes depending on the holiday.
Hot Chocolate Charcuterie Board Variations
Oh, the possibilities. Sometimes I toss in a pinch of cayenne with the dark chocolate for a spicy kick – trust me, it’s incredible. Cinnamon sticks and orange zest make the milk chocolate sing, while flaky sea salt takes white chocolate to new heights. For nut allergies, sunflower seed butter and crushed pretzels give that same satisfying crunch without the risk. My niece (the picky one) loves when I add crushed freeze-dried strawberries – turns the whole board pink and gets her actually excited about dessert.
Serving and Storage Tips
Here’s the good news—this board is almost as fun the next day. Store any leftover toppings in airtight containers (those sprinkles stay crunchy for weeks). The melted chocolate? Just pop it back in the microwave for 30-second bursts when you’re ready for round two. Pro tip: Keep the whipped cream and marshmallows separate in the fridge so they don’t get sad and soggy.
Hot Chocolate Charcuterie Board FAQs
You’ve got questions – I’ve got answers from years of cocoa-filled trial and error.
Can you make this ahead?
Absolutely, Prep all your dry toppings and dippers the night before – just melt the chocolate and whip the cream right before serving.
What’s the perfect milk temperature?
Heat it to about 160°F (use a thermometer if you’re fussy like me) – hot enough to melt chocolate but won’t scald tongues. Nut allergy concerns? Skip the peanut butter cups and use sunflower seeds or pretzels instead. And yes, you can use almond milk – just warn guests first.
Nutrition Information
Just a heads up – these numbers dance around depending on your toppings and chocolate brands. A typical serving runs about 350 calories, mostly from all that delicious chocolatey joy. Remember, holiday treats are about savoring moments more than counting grams.
Share Your Creations
I live for your cocoa board masterpieces. Tag me @CocoaQueen so I can see your brilliant topping combos – bonus points if your marshmallows make perfect snow peaks. Share your creations with us.
For more delicious recipes and updates, follow us on Facebook.
Find more easy morning ideas in our web site.
PrintIrresistible Hot Chocolate Charcuterie Board for 8 Guests
A fun and festive hot chocolate charcuterie board perfect for holiday gatherings. Customize with toppings and treats.
- Prep Time: 15 minutes
- Cook Time: 5 minutes
- Total Time: 20 minutes
- Yield: 8 servings
- Category: Dessert
- Method: No-Cook
- Cuisine: American
- Diet: Vegetarian
Ingredients
- 8 oz dark chocolate chips
- 8 oz milk chocolate chips
- 8 oz white chocolate chips
- 1 cup mini marshmallows
- 1 cup whipped cream
- 1/2 cup crushed peppermint
- 1/2 cup caramel sauce
- 1/2 cup chocolate syrup
- 1/2 cup sprinkles
- 1 cup cookies
- 1 cup biscotti
Instructions
- Arrange chocolate chips in small bowls.
- Place toppings in separate bowls.
- Add cookies and biscotti around the board.
- Serve with warm milk.
- Let guests customize their drinks.
Notes
- Use seasonal toppings for holidays.
- Keep chocolate warm for dipping.
- Provide spoons for easy serving.